
Unlike our popular Mach3 Addons, the Mill Wizard is a stand-alone program used to create G-code for milling parts. The Mill Wizard is a much more advanced package that bridges the gap between a G-code editor and a full featured CAM software package. Parts are easy to create by doing basic operations and chaining multiple operations together.
The order of operations, which tool is used for an operation, and the cutting strategy employed are easily and quickly modified in the operations control window. Editing and copying operations is simple and greatly speeds up the time to make a complete cutting path.
The Mill Wizard includes a user defined material table, a tool table, and machine max settings. With the ability to open and save ‘job’ files, making a small adjustment to an old part or re-running it with a different size tool is simple and fast.
Note: Since it is not an actual CAM package, the Mill Wizard does *NOT* have the ability to import any CAD drawing files.
Purchase a License Download PageHow it Works
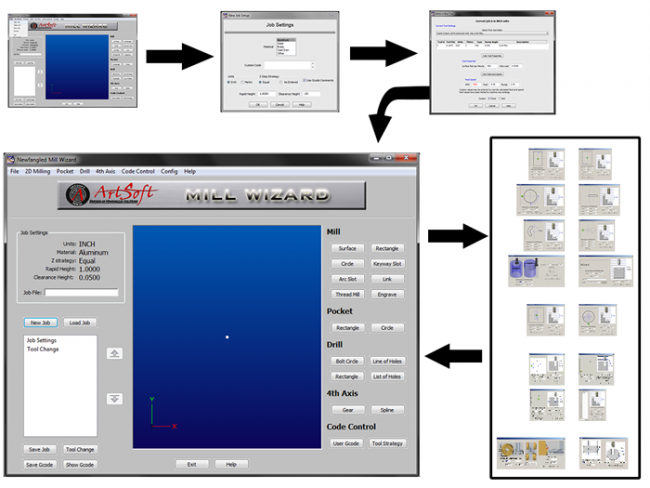
Flow Chart
A flow chart explaining the Mill Wizard.
Use the “Next” and “Previous” buttons to view additional slides.
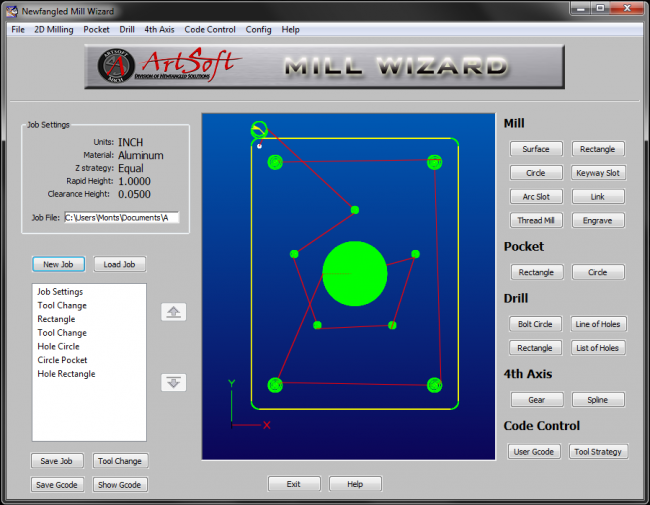
Example Part 1
In the example illustrated here, a motor mounting plate is made. A rectangle is cut with one tool, then a number of holes are made with another tool using drilling/pocketing code.
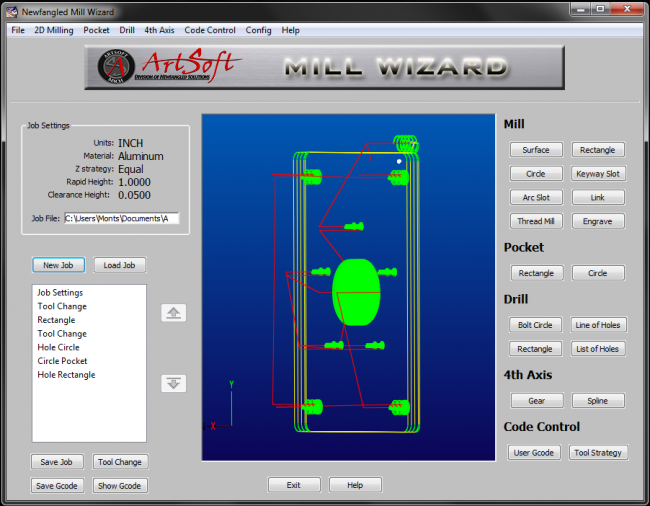
Example Part 2
In this view, the part is rotated to give a different perspective. The Mill Wizard is great for similar parts, instead of using full CAM packages.
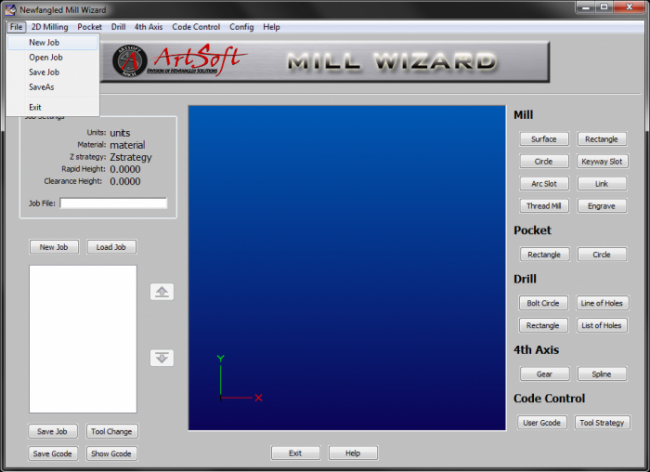
Getting Started
Upon opening the program, the first thing to do is open a Job file. If this is a new project, select New Job from the File menu.
If you are opening an existing project, select Open Job from the menu or drag the existing .job file onto the toolpath window. In this instance we are starting a New Job, which brings us to…
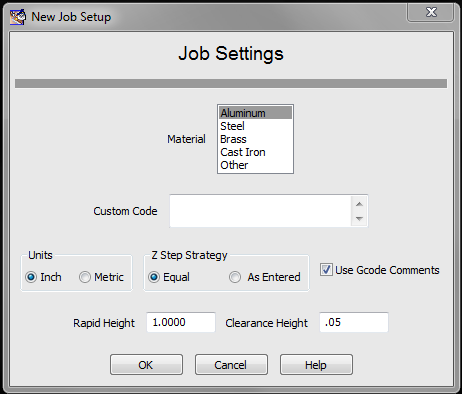
Job Settings
Upon opening the program, the first thing to do is open a Job file. If this is a new project, select New Job from the File menu.
…the job settings. From here, you select the stock material from the list (which can be modified under Config > Materials), add any custom gcode (ie. a custom startup block), and set a few other parameters (distance units, rapid height, clearance height, etc). Clicking OK brings us to…
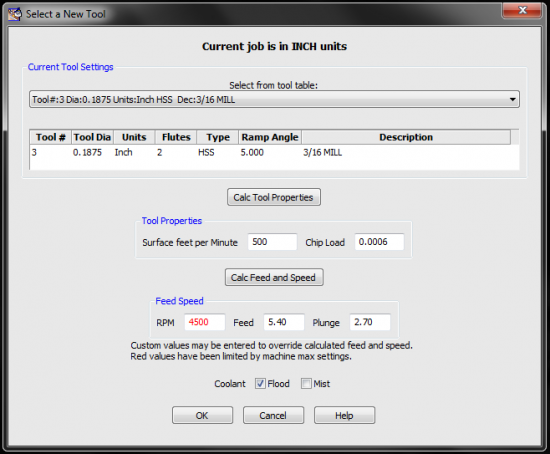
Tool Settings
The drop-down list is automatically populated with entries from the currently loaded tool table (Config > Tool Table).
Selecting a tool will display it’s information and automatically calculate the tool properties and proper feeds and speeds. The tool data can also be manually input if the desired tool has not been added to the table.
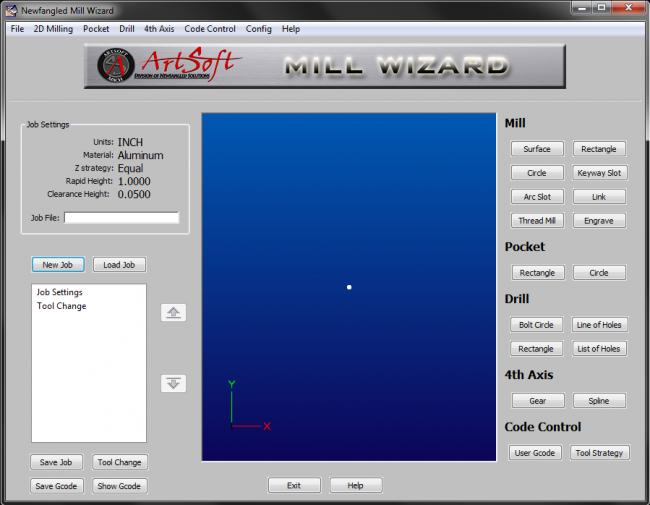
Main Screen
…the main screen. We see that the operations list now shows our Job Settings and a Tool Change for the tool we just selected. At this point we can start doing operations!
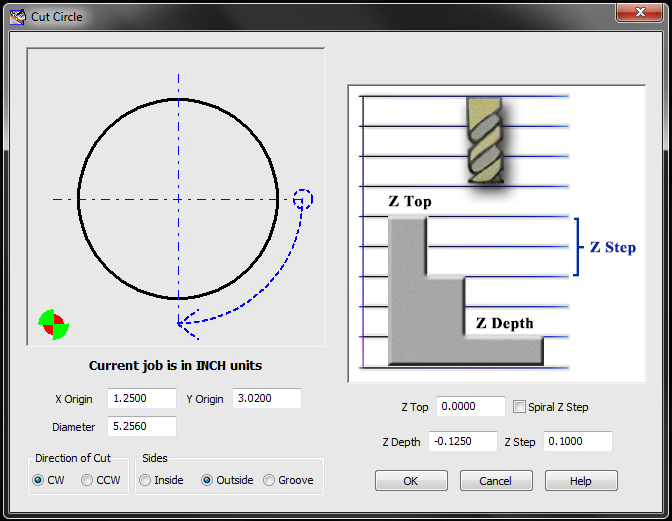
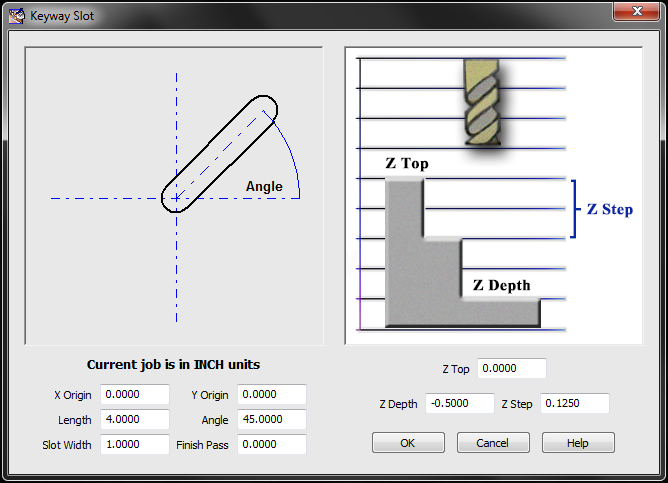
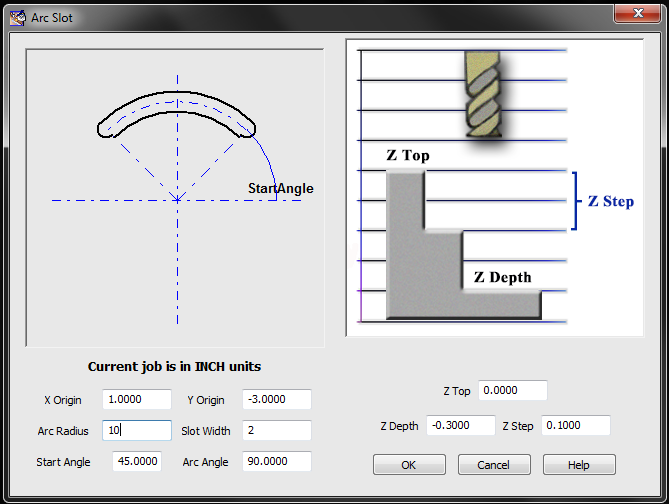
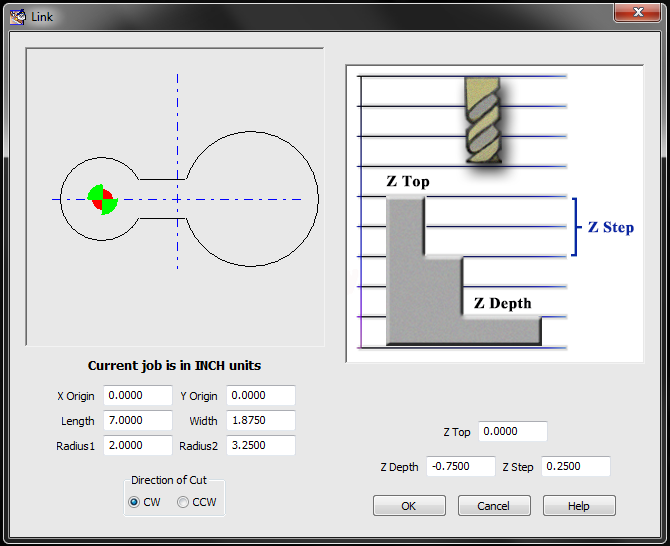
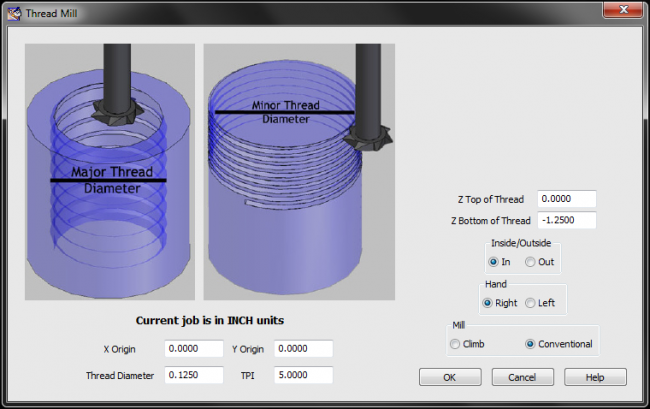
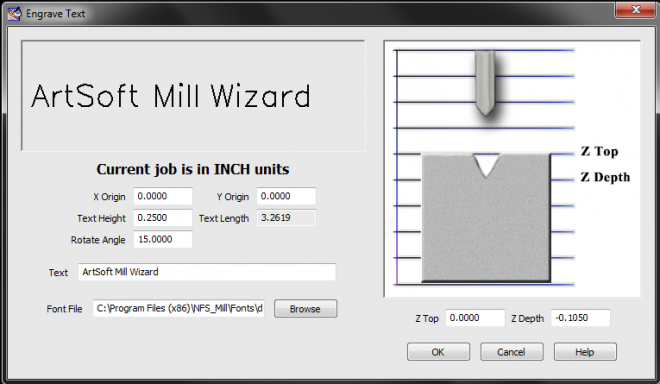
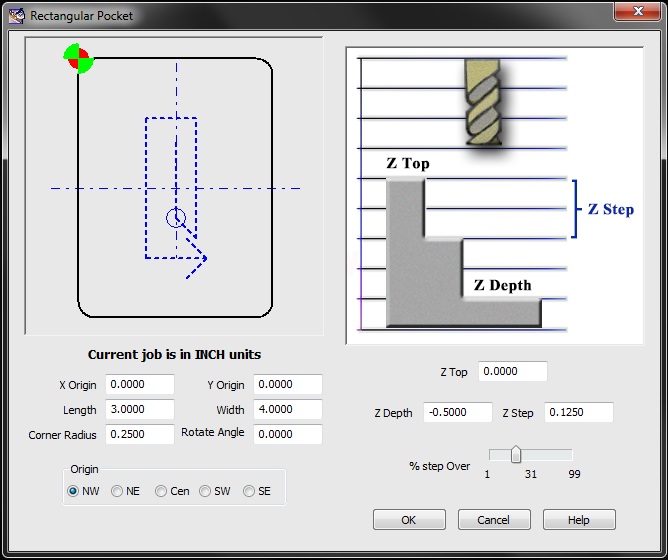
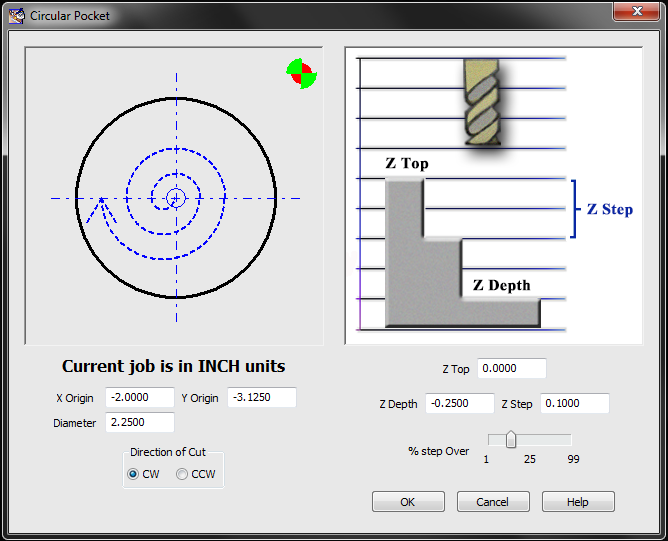
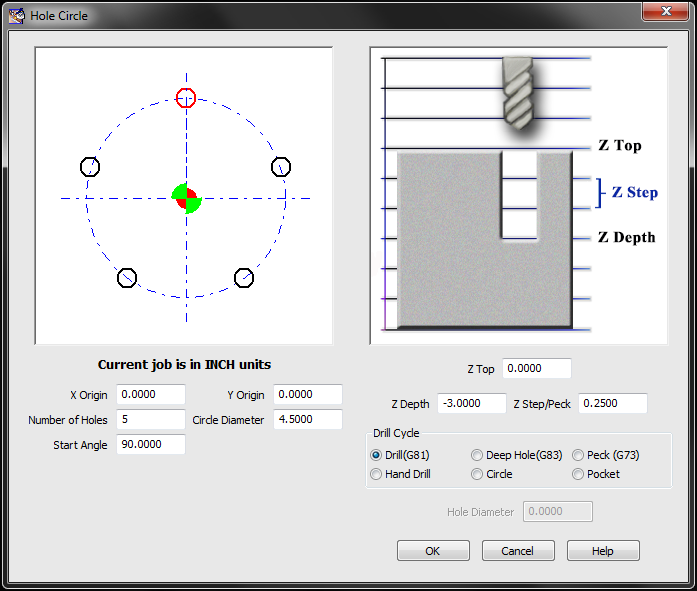
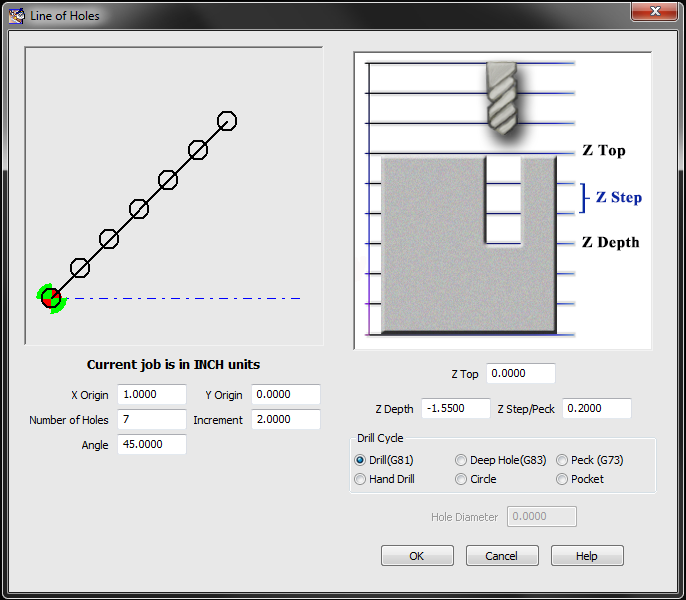
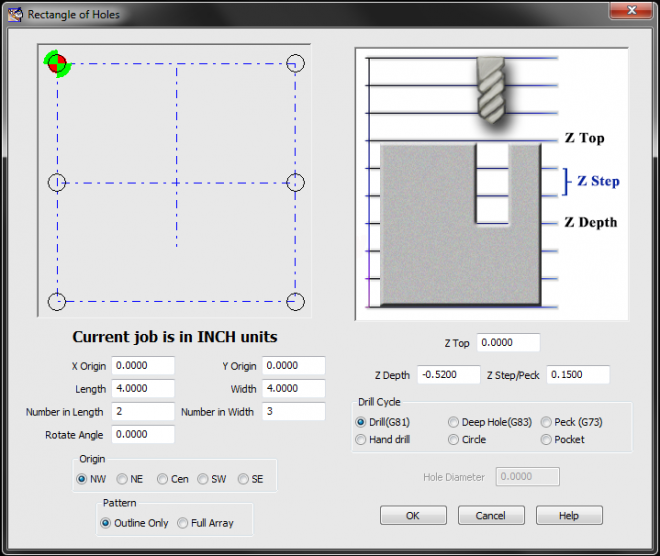
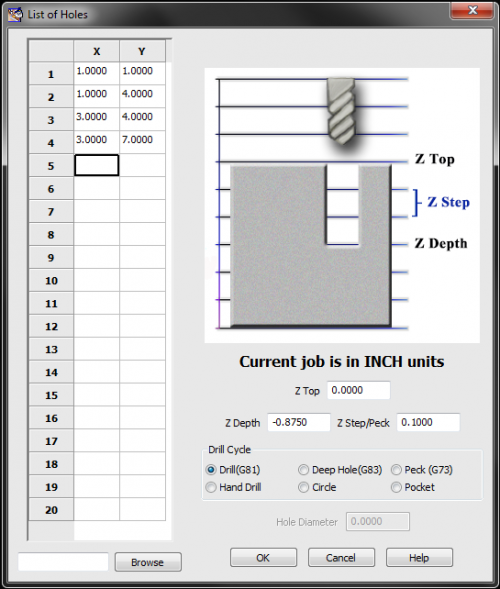
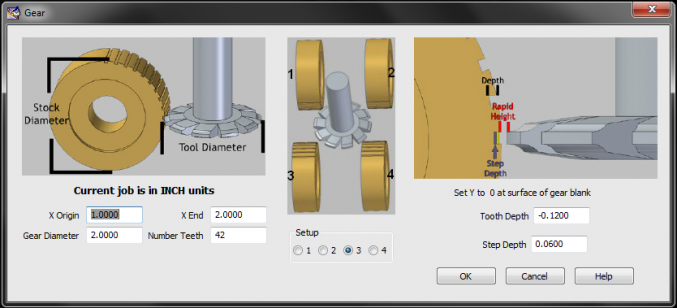
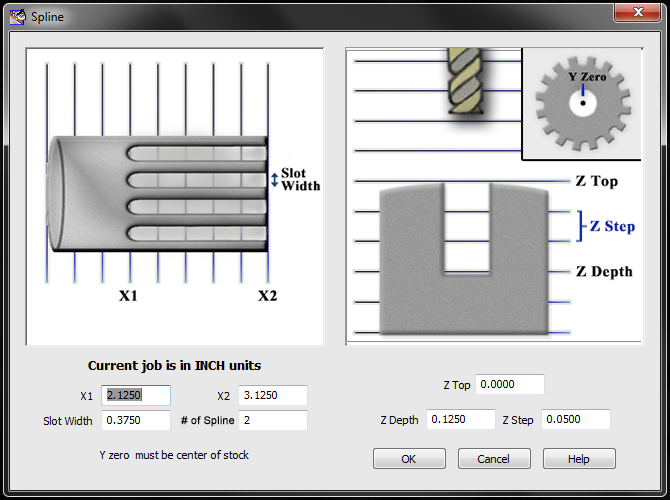
Available actions include: Milling operations (Surface Stock, Cut Rectangle, Cut Circle, Cut Keyway, Cut Arc, Cut Link, Thread Milling, Engrave Text), Pocketing operations (Rectangular Pocket, Circular Pocket), Drilling operations (Circular Hole Pattern, Line of Holes, Rectangular Hole Pattern, Random List of Holes), and 4th Axis operations (Cut Gear, Cut Spline).

General Features
Operations Control Window – Move, copy, and edit, operations, tool changes, or tool cutting strategies
Tool Path Display – Advanced tool path display that Immediately updates to display the current cutting path.
Job Files – Save jobs with many operations, open and edit them quickly.
Current Operations: mill surface, rectangle, circle, keyway slot, arc slot, link, thread mill, engrave, pocketing, drill bolt circles, lines of holes, rectangles, list of holes, etc…
New operations are constantly being added.


Licensing
The Mill Wizard is licensed for full use. The program may be run in demo mode without a license. In demo mode all operations are functional except ‘Save G-code’ and ‘Show G-code’. The Mill Wizard can be used without a license to create and save job files. The Job file can then be opened with a licensed copy and used to create the G-code. This method provides some flexibility for users who only purchase one license.
The license is linked to a specific PC, requiring a different code for each PC. Use the ‘About’ screen, accessed by the ‘Help’ menu to get the PC code. You must have this exact PC code from the actual PC you wish to license and generate G-code. To obtain your license key, Click the ‘copy ID to Clipboard’ button in the ‘about’ dialog box when running the software in demo mode and paste this ID number in the appropriate location on the website when purchasing your license.
IMPORTANT NOTE: The LICENSE will only work for the Computer for which you supplied the PC ID. Each PC has a unique ID code and the license works in coordination with this code.
If you upgrade or exchange your PC, it will be necessary to contact licensing for a replacement.
When available, updates for the Mill Wizard are posted on the Downloads & Update page. To update to the newest version, download the current version of the Mill Wizard and install it. Your customized tool table, material table, and machine settings should not be affected by updating.
*It is recommended that users update the Mill Wizard when new versions become available to acquire new features and functionality.
Minimum Requirements
Laptop or Desktop
- Windows XP, Windows Vista, Windows 7, Windows 8 (Must be run as admin in order to work properly)
- 2Ghz CPU
- 1GB RAM
- Video Card with 256MB RAM and OpenGL3.0 or higher


Purchase a License Download Page