A user contacted me asking how to get an operator interface to interact with the screen set. A button interacting with the screen set has been a key function of Mach4 since the inception of the screen designer. In this blog I will try to give you the power to make this happen.
The first concept you need to understand is the idea of an event driven system. The “event” is telling you that something happened. For example, we will look at what happens when you have a button press. In this example the button will be a NO (Normally Open) providing a zero when off and a one when it is on. When the button is triggered an event input is sent with a 1 saying that your finger is on the button. When you take your finger off the button an event of zero is sent saying that you have taken your finger off of the button. Why would we ever need to know that the button is down? Operations like jogging are handy to have an up and down event on. Also, if you would like to have a tool release button, it is nice if the tool releases when the button is in the pressed (1 state). Now let’s make this work in the code.
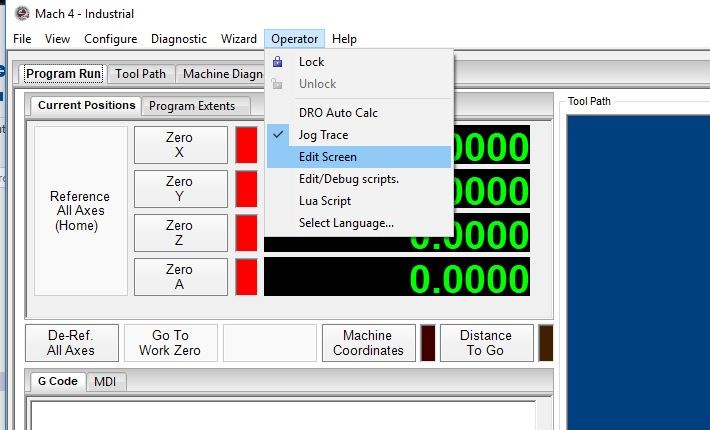
This task is going to require some screen editing. With Mach4 in a disabled state you can enter screen editing mode. This is under operator-> Edit screen
In the screen editor you can edit the screen scripts. Access the scripts in the left-hand tree portion of the screen.
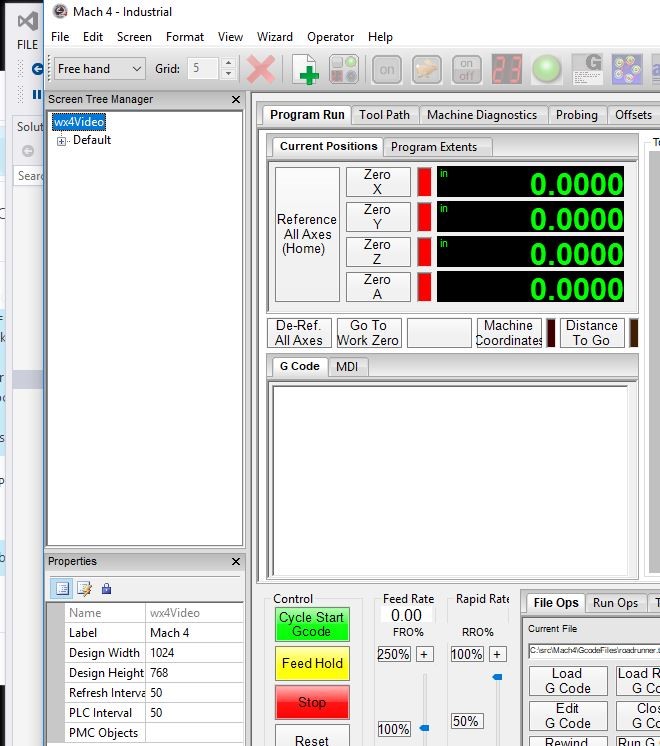
Select the screen name in the ‘screen tree manager’.
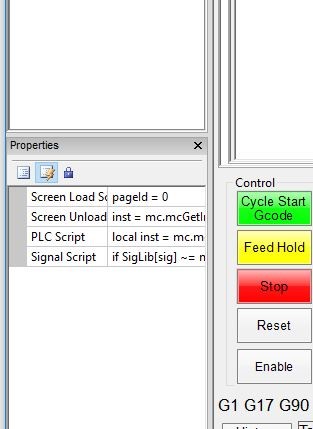
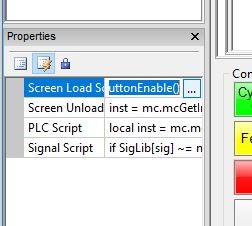
When you click on the ‘screen load script’ a small button with three dots will appear. This allows editing of the script in mcLuaEditor.
You should have something that looks like this after pressing the button with three dots.
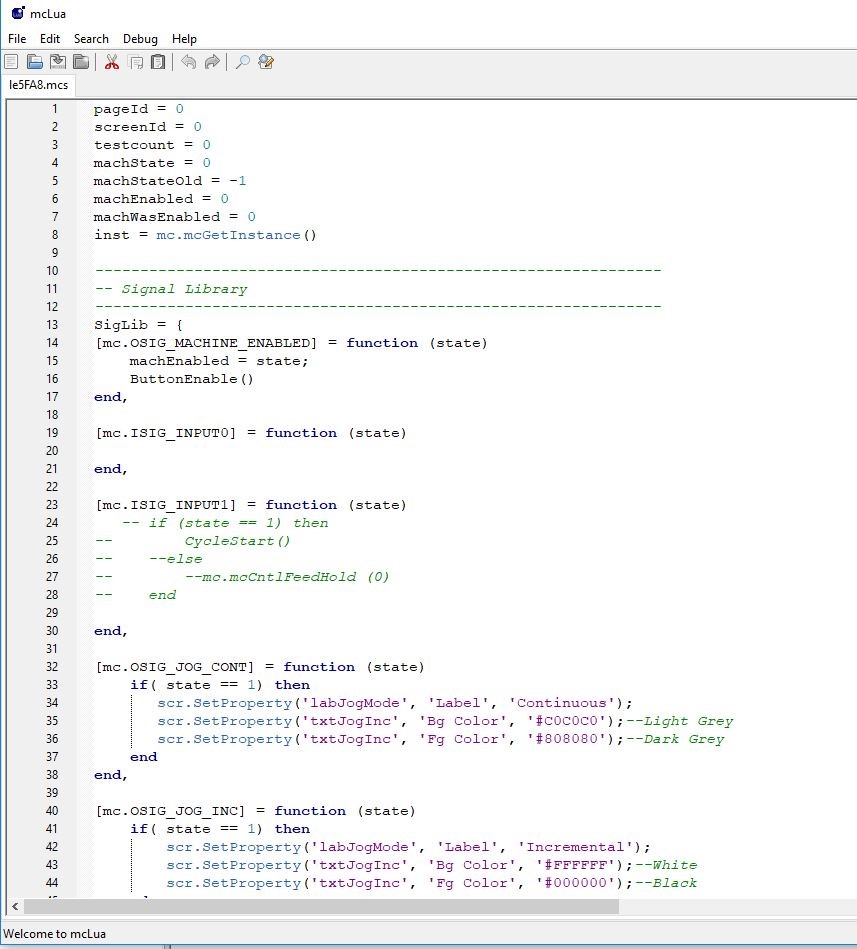
Now we are working on the actual script. ‘SigLib’ is a table that holds functions that allow you to have access to the events in Mach4 such as inputs and outputs. A fun example of this is in the table at [mc.ISIG_INPUT1] You can see that we have some code that is green because they are comments. The minus, minus sign before the code makes it into a comment in the Lua language. For a test, remove the double minus signs as shown in the following example:
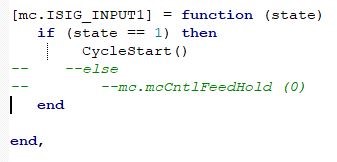
This will call or enable the cycle start button code just like the button was pressed. When input 1 is high (you pushed the button with your finger) a cycle start will be sent.
The code that we left green (commented), is to make it so you have to keep your finger on the button to allow motion. When your finger comes off the button the mc.ISIG_INPUT1 event is called with a State == 0, so it will fall into the “else” part of the “if” statement and send a FeedHold to the system. The trick is to know what Lua call you need to specify to have the system perform the correct action.
We have some other things we can do to make Mach4 do our bidding. The “scr.” functions have lots of power, allowing you to read and set values. You can change the color, text, position, size … you name it, on the fly! The other fun thing you can do is “Press” the button with another script. You can do a scr.ButtonClick(<name>) to simulate clicking the button. You also can simulate the up and down action of the buttons on the screen.
What you should get from this post is that we have ways to tie the physical world to the screens and if you would like to exercise this power you will need to learn a small amount of Lua. But you should also note that we have put some examples in the screens to show you how this is done.
Please see the following video for more information
Good luck and enjoy!
From Script Monkeys… Powered by bananas