Hello Guest it is March 18, 2024, 10:38:40 PM

Author Topic: Gertrude Gets Some!  (Read 250162 times)

0 Members and 1 Guest are viewing this topic.

Offline Chris.Botha

*
  •  488 488
  • wine me.. dine me.. tram my mill for me...
    • View Profile
    • Digital-Jeweller
Re: Gertrude Gets Some!
« Reply #270 on: June 13, 2010, 03:28:10 AM »
he exercise here was completely hypothetical, to see if i could produce a piece of jewellery on a mill with no actual geometry, only 2d curves..

it was a resounding success, and not only that it was FAST.. i sim'd it at 400m/min but cut at 800-1000 average velocity, 22min total cutting time :)


Offline Chris.Botha

*
  •  488 488
  • wine me.. dine me.. tram my mill for me...
    • View Profile
    • Digital-Jeweller
Re: Gertrude Gets Some!
« Reply #271 on: June 23, 2010, 06:14:08 PM »
believe it or not im actually having alignment issues with my mill.. not that you can tell from this 3sided job ;)


Re: Gertrude Gets Some!
« Reply #272 on: June 30, 2010, 12:34:18 PM »
is that broke?, you make nice stuff ;D

Offline Chris.Botha

*
  •  488 488
  • wine me.. dine me.. tram my mill for me...
    • View Profile
    • Digital-Jeweller
Re: Gertrude Gets Some!
« Reply #273 on: June 30, 2010, 03:56:31 PM »
lol no its to be cast in two colors, white gold top, yellow gold bottom :)

Offline Chris.Botha

*
  •  488 488
  • wine me.. dine me.. tram my mill for me...
    • View Profile
    • Digital-Jeweller
Re: Gertrude Gets Some!
« Reply #274 on: July 03, 2010, 08:11:18 PM »
i have been fielding lot of emails about "methods" or "strategies" when it comes to milling. I always answer similar to this.. If you had to make it by hand how would you go about it. most people would have about 10 different ways to do it. milling is the same. look at what you are making. how hard it will be to clean up. what material you are casting in etc. and develop a strategy based on your needs. no magic bullet strategy's im afraid ;)

I almost had this one grown but decided wall incline vs damn grower lines was worth the post casting cleanup :)

I was going to assemble in wax but decided i prefer to polish inside then seat solder in platinum after casting.


Offline Chris.Botha

*
  •  488 488
  • wine me.. dine me.. tram my mill for me...
    • View Profile
    • Digital-Jeweller
Re: Gertrude Gets Some!
« Reply #275 on: July 07, 2010, 03:23:52 AM »
believe it or not im actually having alignment issues with my mill.. not that you can tell from this 3sided job ;)


this one done,


Re: Gertrude Gets Some!
« Reply #276 on: July 07, 2010, 08:50:20 AM »
WOW, that should make the ladies weak in the knees. Nice work, Always impressive.

Offline Chris.Botha

*
  •  488 488
  • wine me.. dine me.. tram my mill for me...
    • View Profile
    • Digital-Jeweller

Offline Chris.Botha

*
  •  488 488
  • wine me.. dine me.. tram my mill for me...
    • View Profile
    • Digital-Jeweller
Re: Gertrude Gets Some!
« Reply #278 on: July 09, 2010, 07:29:38 PM »
I have long been enamoured by the fixture from Lex at DeskProto and after some discussion he happily provided me with a unit for testing. I have copied this post from our old forum where more in depth information is available.

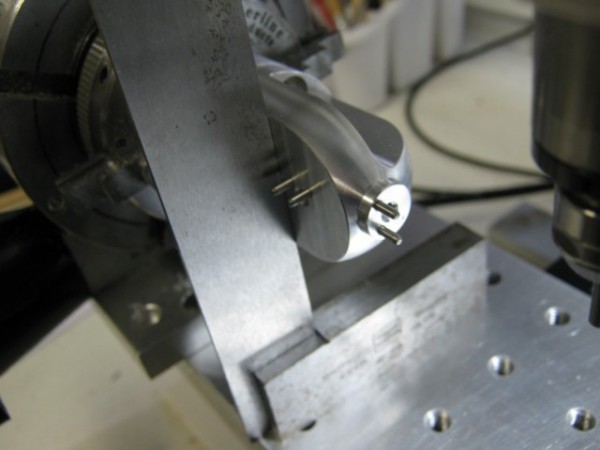
I locked the fixture into my Sherline rotary and the time arrived to dial this sucker in!

The fixture relies on a perfect A and Z and X setup, Y and Z should both already be setup before you even set this fixture up since you will be locking into your rotary unit and would have this dialled in.

Lets get to it!

1: Finding perfect A... easy! roll the whole unit in A against a table square on your mill table, set your jog to 10% and slowly roll until no light is visible between the square blade and the fixtures top surface.


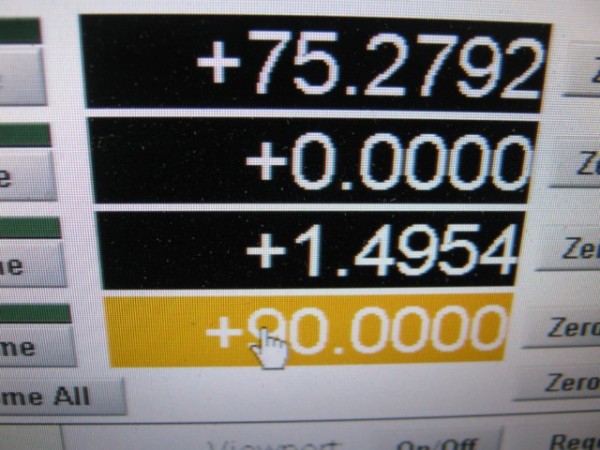
2: Click in the A DRO in Mach and type in 90 (or 270 depending on which side you setup the fixture table) then run the command G0A0. Simple - A is now perfectly flat to the spindle and A is now set :)


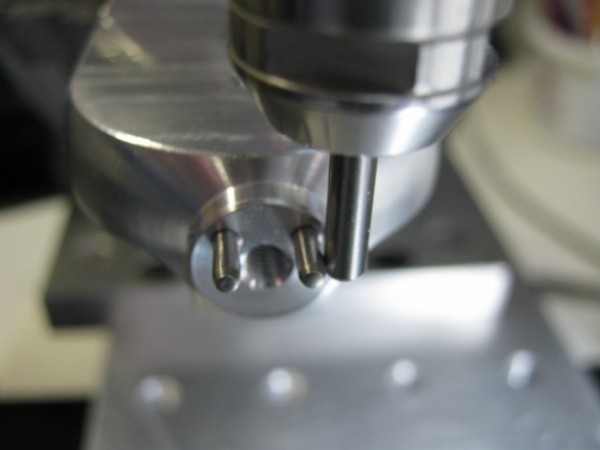
3: Time to setup X.. this too is pretty easily done, but make sure you are 100% carefull in this step, the 123waxringWizard software relies on X heavily, even a minor misalignment here will be amplified in your final model.. measure twice, cut once. To setup X drive the back of a 3.17 (1/8th) cutter up to the very edge of the fixture like below, CAREFULLY, set your jog speed right down when you get closer. when you are touching the fixture zero out X and drive directly upwards in Z away from the fixture, now time to correct our tooltip width, run the command G0X-1.585 then rezero X. Thats it for X.


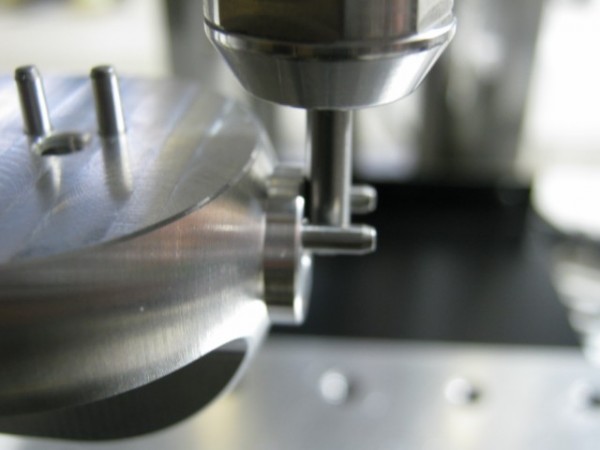
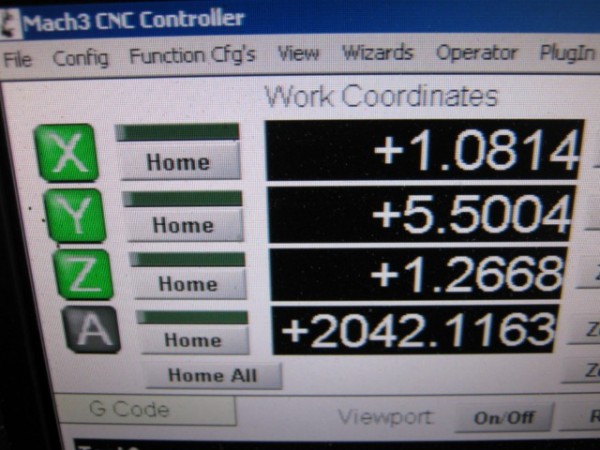
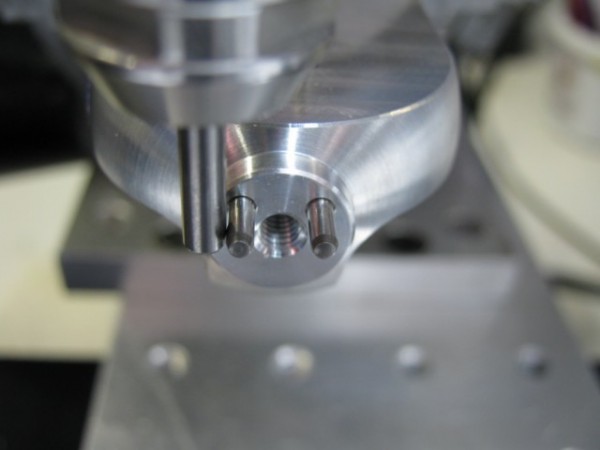
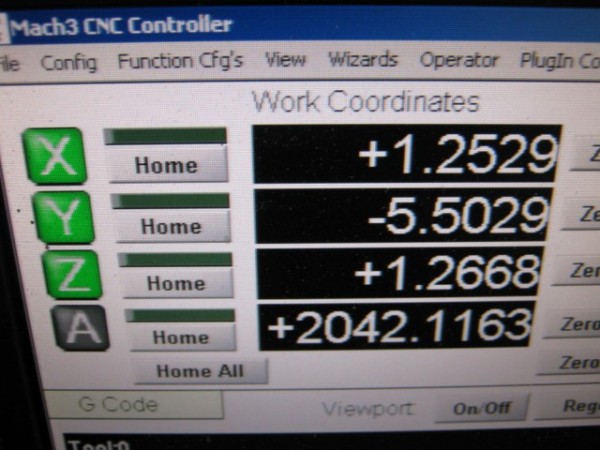
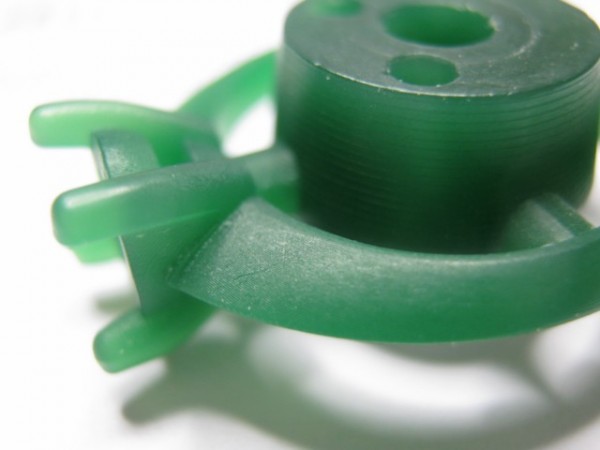
4: these images are merely the way that I verified my Y before cutting, I am including them because all thing swith movable parts are subject to tolerances so screwing the fixture into its Sherline adapter may introduce errors, and even tho they are minor in most case its good to know how to look for them. Basically i drove my cutter to the very edge of each pin in Y and check the Mach DRO for position in Y on either pin, these should be virtually the same number only different in positive/negative assignment. Y verified!


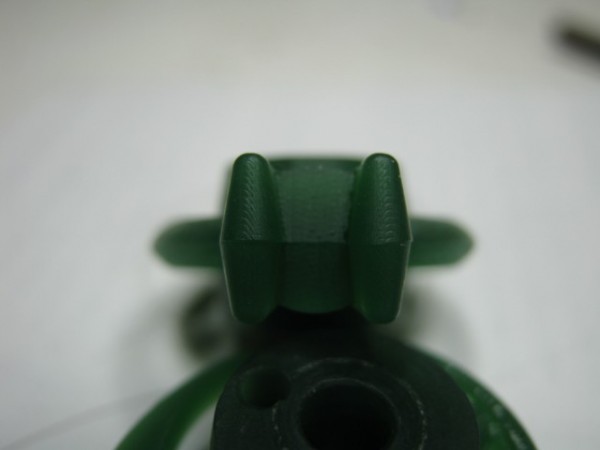
5: Time to cut.. The software would have told you what thickness disk to use, lock it in the fixture with the chosen cutter in place and probed.
The first path will complete with half the disk cut away to reveal one side of the ring.


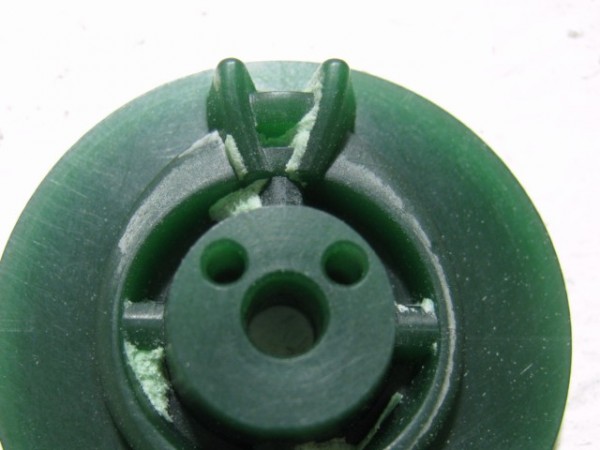
Turn the disk over and lock it back in. Cut the second path, you should be left with a well aligned flip cut wax, ready for the final rotary pass.


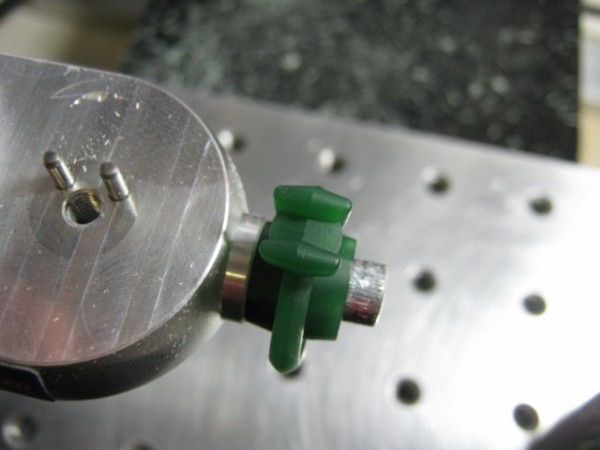
Lock it onto the rotary pins and lets finish this up!
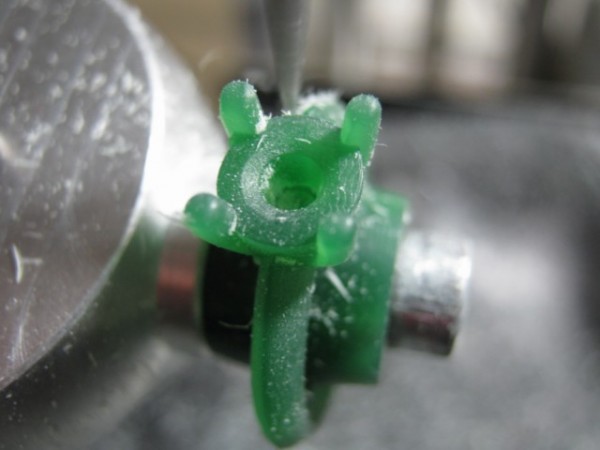
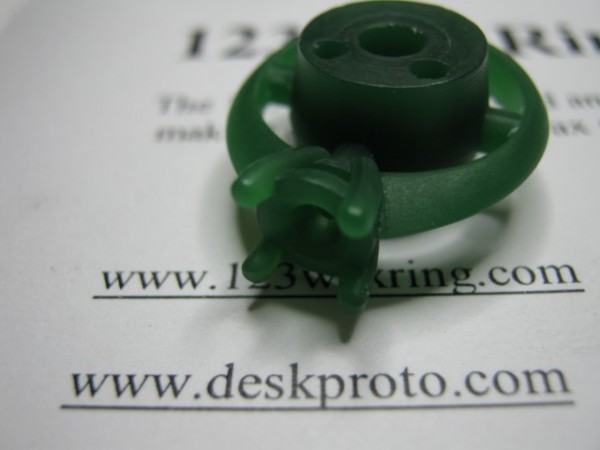


And we are done!

Thank you for taking some time to read through this pictorial :)


Regards
Chris Botha

Offline Tweakie.CNC

*
  • *
  •  9,194 9,194
  • Super Kitty
    • View Profile
Re: Gertrude Gets Some!
« Reply #279 on: July 10, 2010, 04:31:23 AM »
Looks easy Chris.  :D

Can you make your own wax for this fixture or do you have to buy the ready made blanks ?.

Tweakie.
PEACE