This project is over a year old but eventually made me a decent size lump of cash. Here’s some info & pics that may be interesting to my fellow newbies.
I bought a Denford MicroMill off Craigslist for $100 with no software or dongle. With help from various nice guys on the Denford UK forum, I was able to remove the serial board from the SmartStep3 controller and connect the step/dir/gnd pins to a B.O.B. and control it with Mach. Once I got the axes moving I went through the thing adding acetal thrust washers to tighten up the slop, gravity feed oilers and brackets to connect the top of the Z column to the enclosure to take out much of the flex in the column. I also added a counterweight/pulley system to the Z to ease the burden on the puny (80 oz/in) stepper motor.
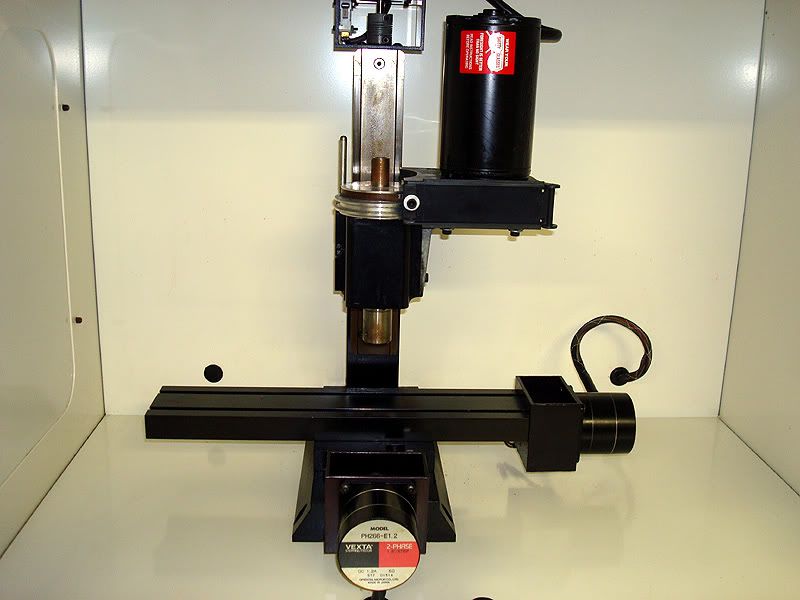
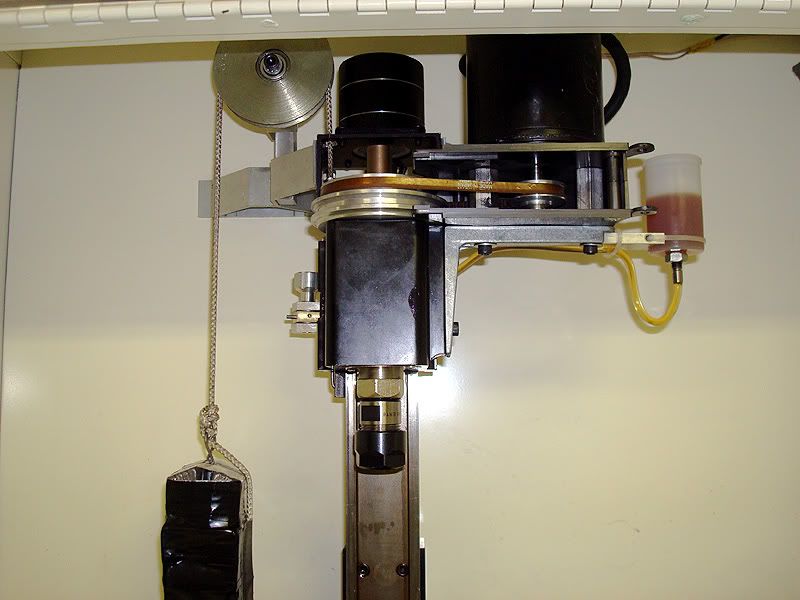
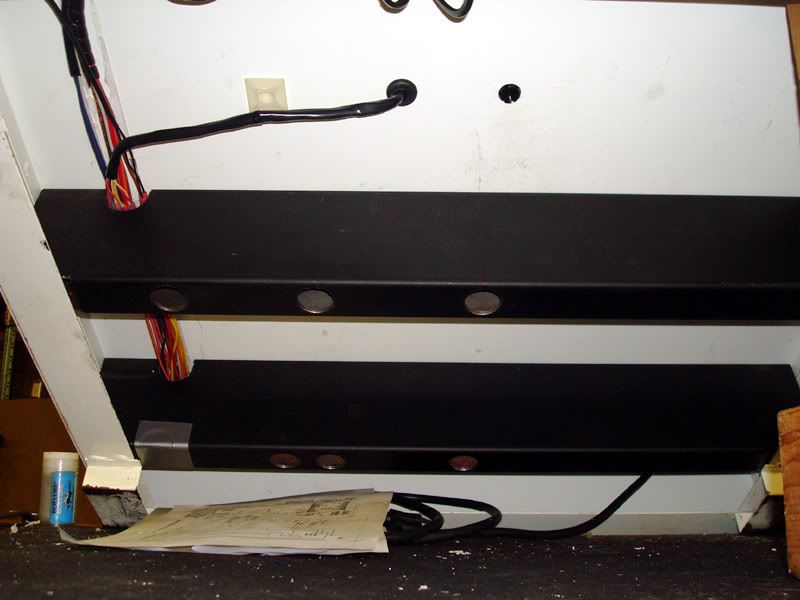
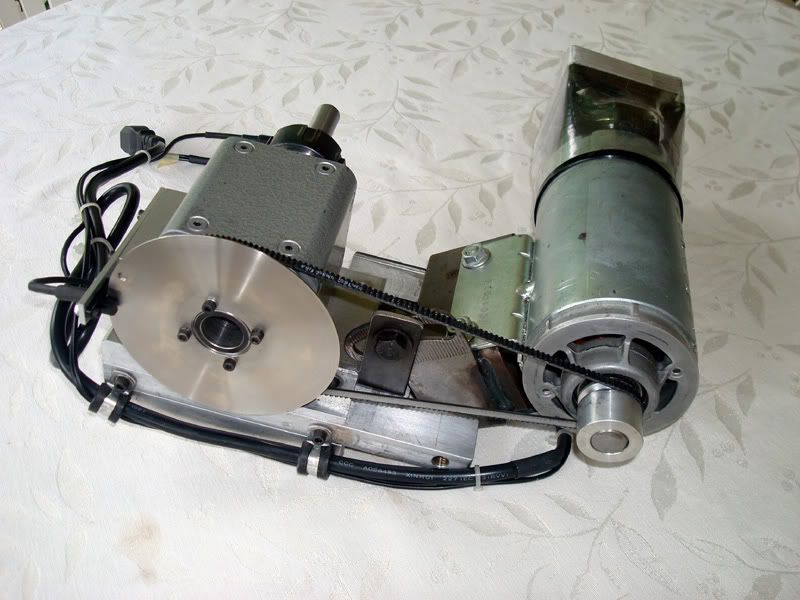
It worked as good as a tiny mill could but I decided what I really wanted was an option to add a CNC lathe function. I had enough stuff lying around to cobble up a treadmill motor powered ER32 spindle assy. that mounts to the left side on the mill enclosure floor. I added rectangular steel tubing bolted underneath the enclosure floor to stiffen it up before mounting the assy. and it’s plenty rigid for the small work I’ve done with it. Hood just thinks he’s got a “wee lathe....THIS is a wee lathe!

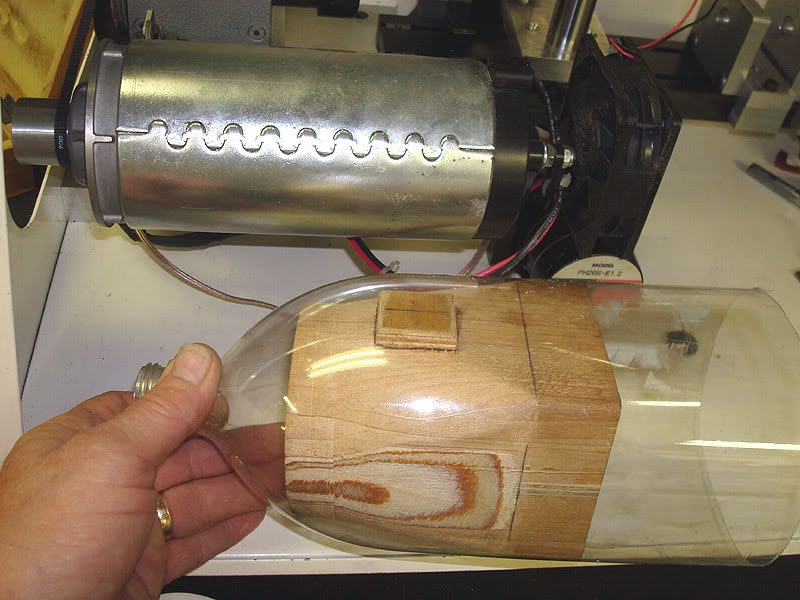
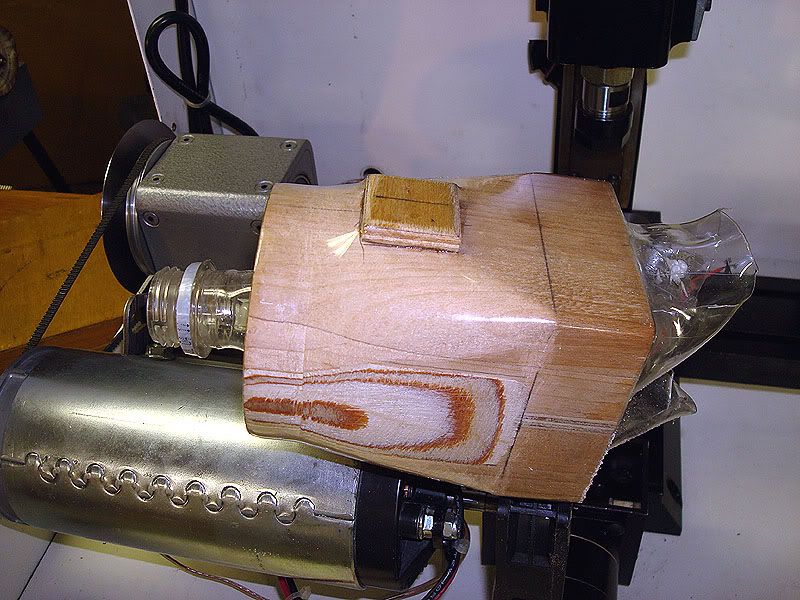
I had removed the treadmill motor’s flywheel/fan to install the drive pulley and was concerned about overheating so I installed a 12V server cooling fan. I made a plastic duct by heatshrinking a 2 liter soda bottle (P.E.T. plastic) over a homemade wood plug.
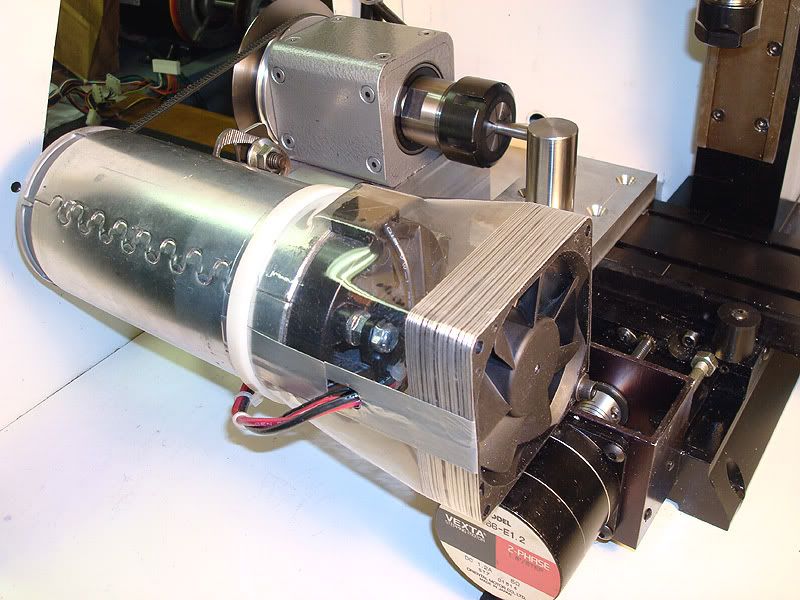
I made a little toolpost and mounted it on the left end of the mill table and it worked very well for what it was.
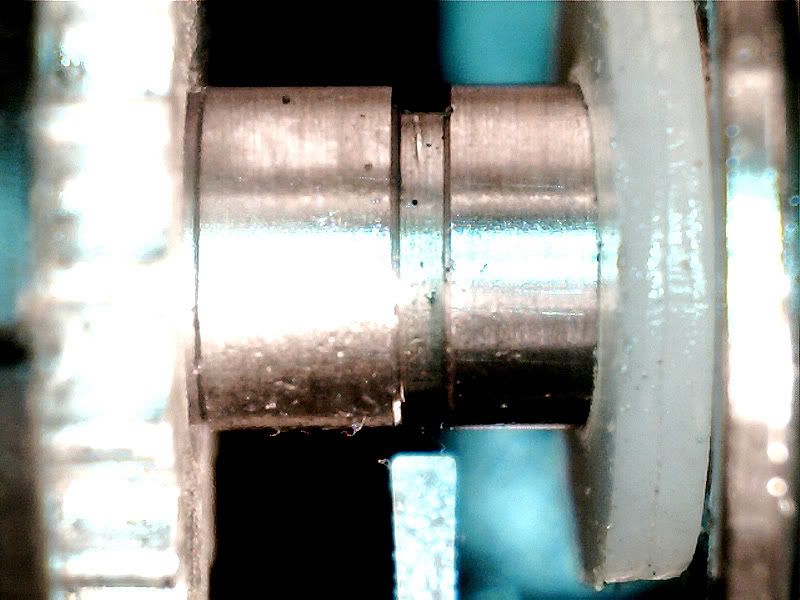
Coincidentally within days of getting it running, a neighbor/friend down the street asked if I could repair some roller shafts for him and the company he works for. The shafts were manufactured by one of their vendors and are beautifully made from 303 stainless covered by a precision ground rubber cover. The problem was that that the shafts were snapping off at an e-clip groove after being in use for a while. The bottom corners of the groove weren’t made with the specified radii and the sharp corners created a stress riser and the shaft eventually fatigued & broke there. My task was to remachine the groove using a wider tool with larger radii in the corners to blend into the “floor” of the groove, taking a minimal amount off the diameter.
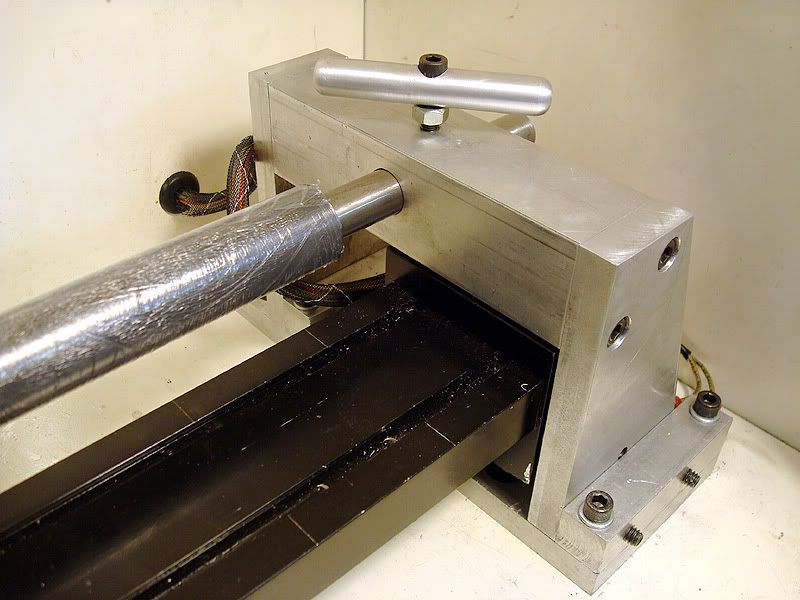
The shaft had to be chucked by an aluminum sprocket on one end and fortunately was small enough that I could make a thinwall acetal bushing and chuck it in a 3/4” ER collet. The other end of the shaft had to be restrained by a tailstock. Mine had no tailstock so I had to make one that bolted to the floor of the enclosure on the right side and straddled the mill table.
Once the shaft was chucked up, I realized I could barely see the groove much less the .0075” specified radii in the corners or the bottom of the groove. I mounted a cheap USB microscope to the machine so I could see the groove & tool alignment and set the depth of cut properly. Here’s the view through the scope. To give a bit of reference, that shaft is ¼” dia. And the Kaiser thinbit carbide tool is .021” wide.
Unfortunately the close up view with the shaft turning revealed the groove wasn’t concentric with the shaft or the sprocket so I made a D.I. tip with a .015” blade to reach down into the groove to accurately measure the runout of the bottom of the groove. The runout tests made me a bit queasy as I found it was different on every shaft and I realized every one of the 1060 shafts would have to be dialed in individually before making the cut!
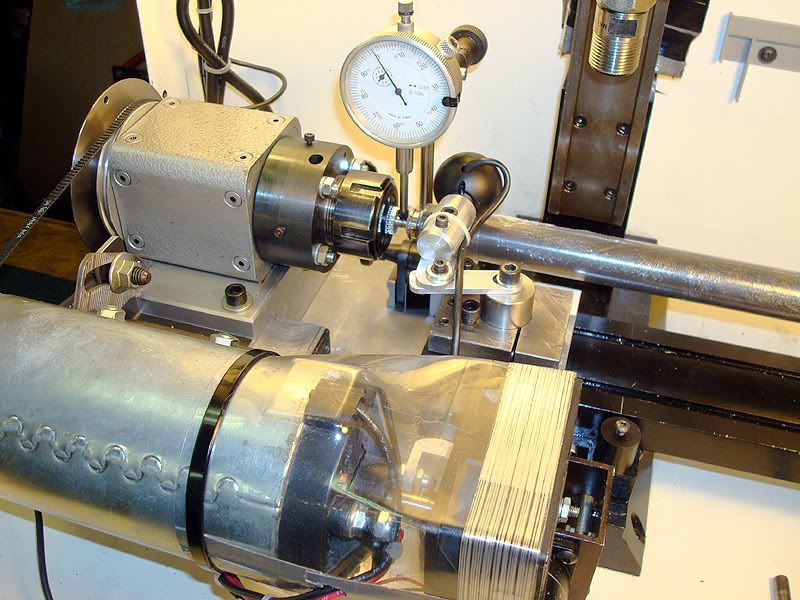
I decided I would have to make an adjustable (poor man’s set-tru) ER32 chuck that would both do the job and fit into the tiny bit of real estate available in my little machine. I wasn’t confident enough in my skills to make a new spindle from scratch so I sacrificed an ER32/R8 and a ER32/MT2 collet chuck to make it. I cut them apart and added 2 interference fit flanges with a raised boss on one and a recess in the other to allow the 4, 6-32 brass-tipped screws to adjust the shaft into place before the 4 nuts are tightened. I turned a press-fit sleeve to go onto the end of the R8 shaft so that I could single point the 1 1/8-18 TPI thread to fit the preload ring nut and turned & polished a 30 mm journal to fit the pulley end bearing. The R8 taper was turned down & polished to fit the other bearing.
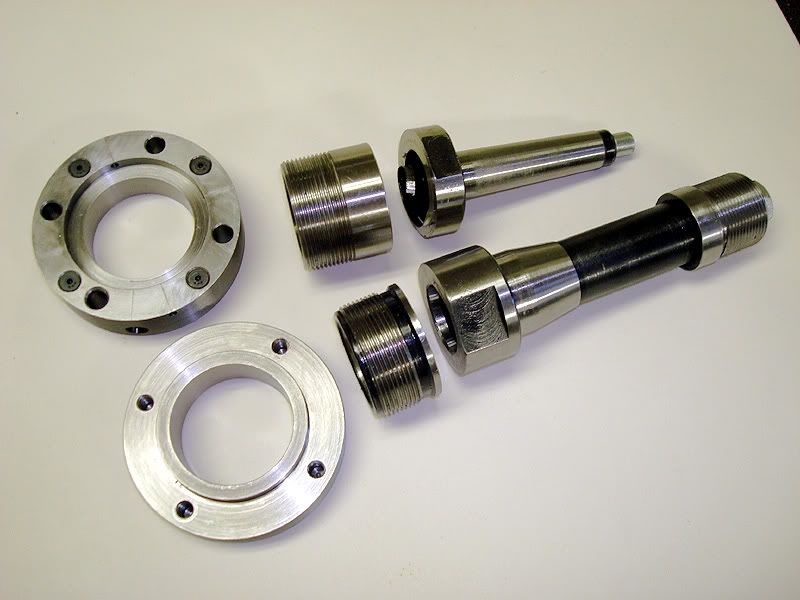
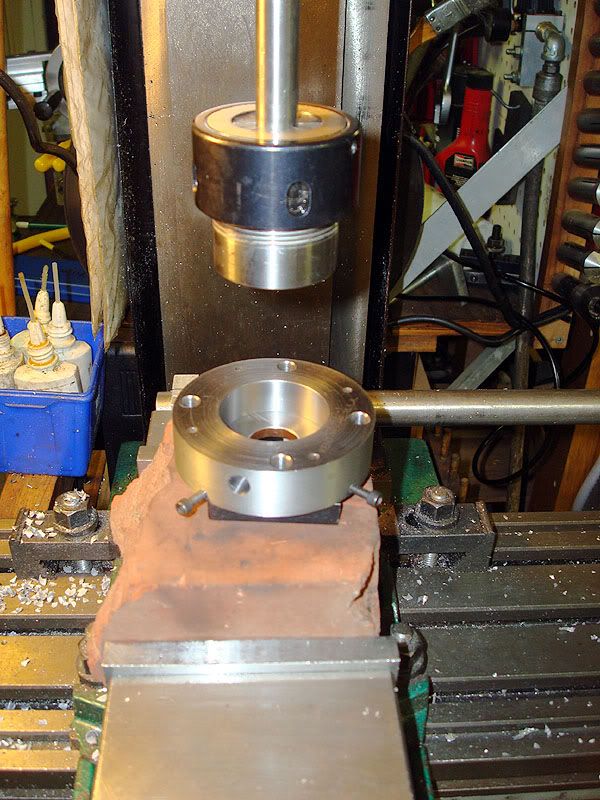
I used the mill to assemble the shaft and ER stub to the pre-heated flanges to insure proper alignment. The .002” interference fit holds the parts together well.
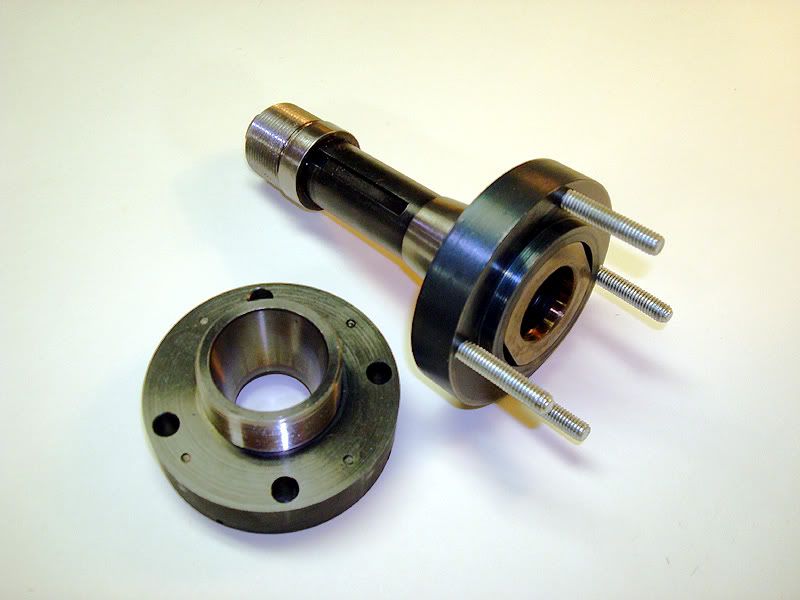
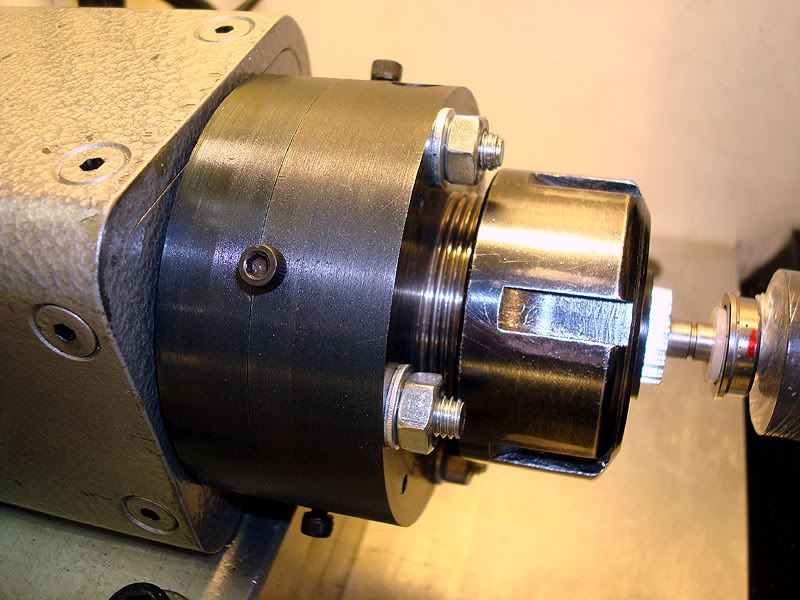
It worked great and allowed me to chuck up the shafts & dial in the groove bottoms to .0002” to .0005” runout even though some of them were slightly D-shaped.
Here’s a pic of the rig in use. I became very familiar with this view over the 4 months of spare time it took me to modify the machine and finish all 1060 of the shafts.
