Hello Guest it is April 24, 2024, 05:01:32 AM

Show Posts

This section allows you to view all posts made by this member. Note that you can only see posts made in areas you currently have access to.


Messages - DICKEYBIRD

Pages: « 1 2 3 4 5 6 7 8 9 10 11 12 13 14 15 16 17 18 19 20 21 22 23 24 25 26 27 28 29 30 31 32 33 34 35 36 37 38 39 40 41 42 43 44 »
401
Show"N"Tell ( Your Machines) / Re: Denford ORAC lathe retrofit.
« on: September 24, 2012, 11:23:57 AM »
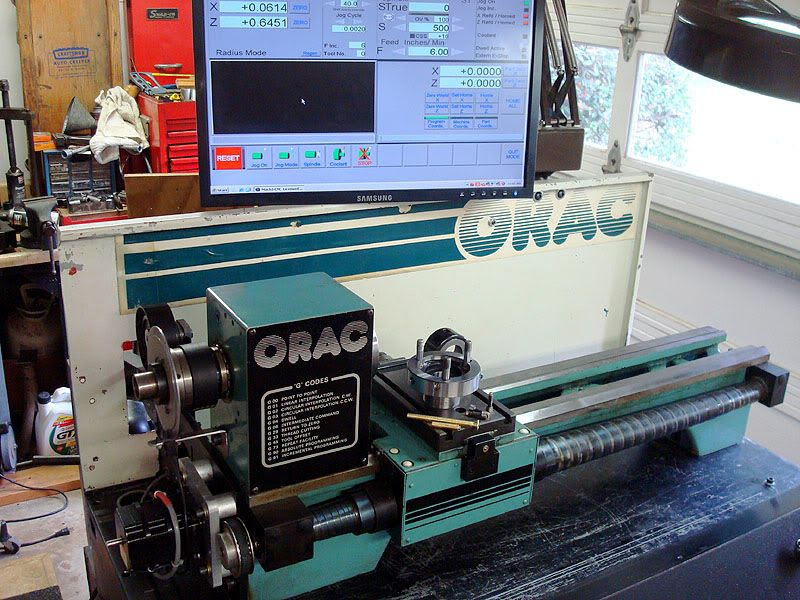
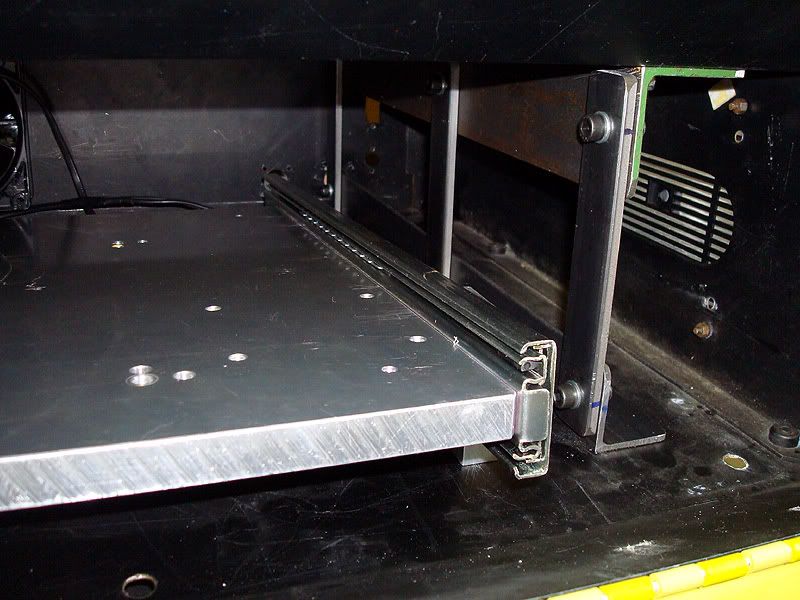
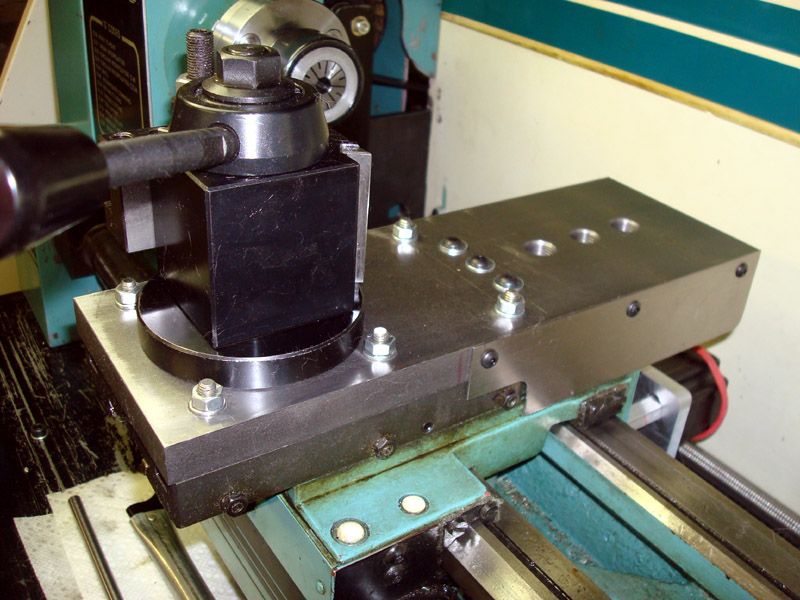
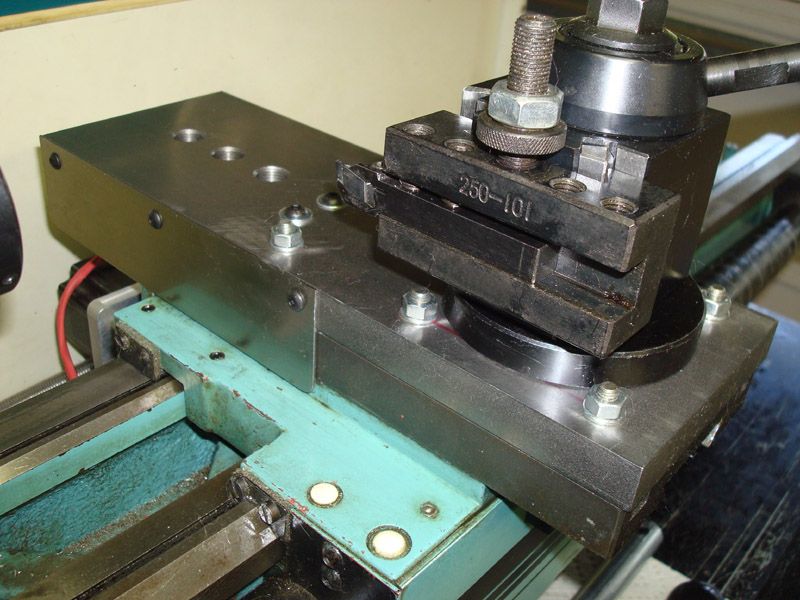
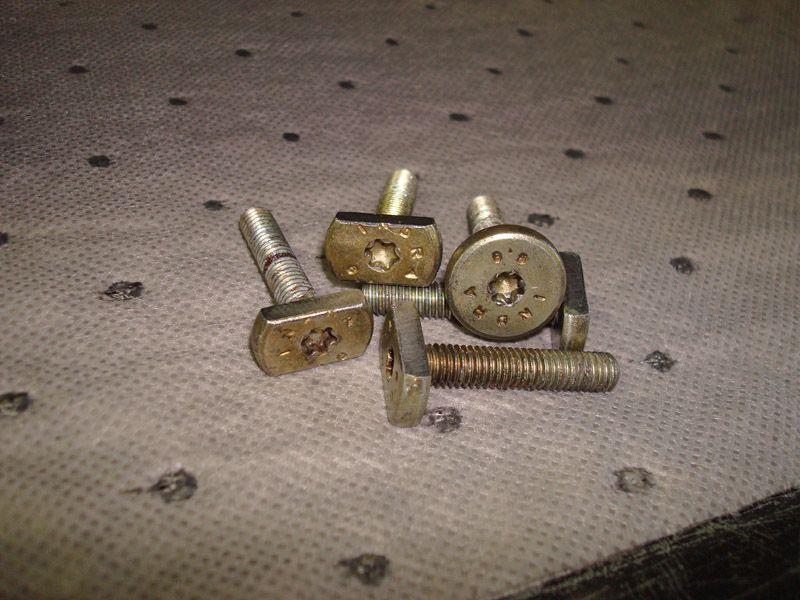
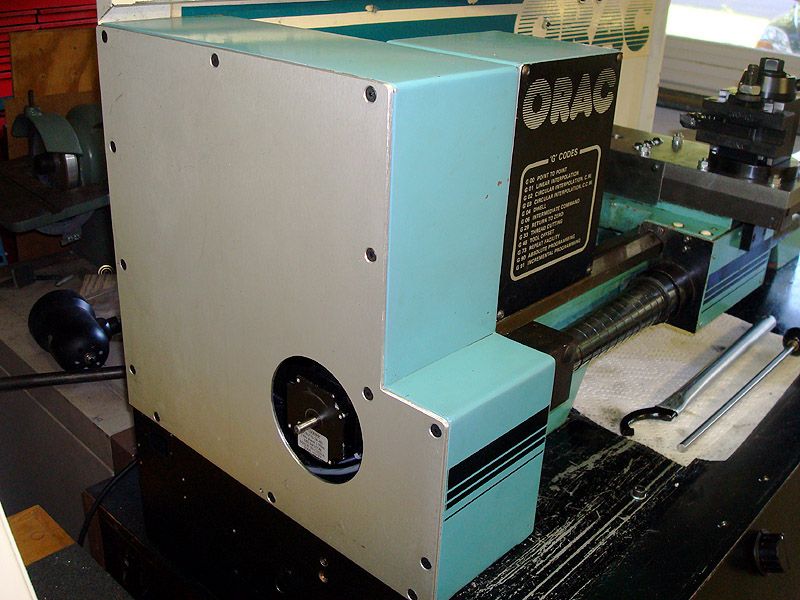
Made a bit more forward progress on the little ORAC.  Made up a 5/8 x 4 x 11" add-on tool holder plate so a 2nd QCTP can be mounted on t'back side.  Drilled/tapped 3 holes to allow some flexibility in where to mount the QCTP stud.  The 3 little button head screws give access to oil the ballscrew and the slides, added a couple sheet metal covers to keep the swarf out of the moving bits.  The little 6mm tee-bolts are are hard to find for the C8 carriage slots but I found that ZF wide head auto transmission pan screws (had a sackful of lightly used ones on hand) are a perfect fit with a bit milled off each side.  That should quiet my Scottish ancestors. ;D

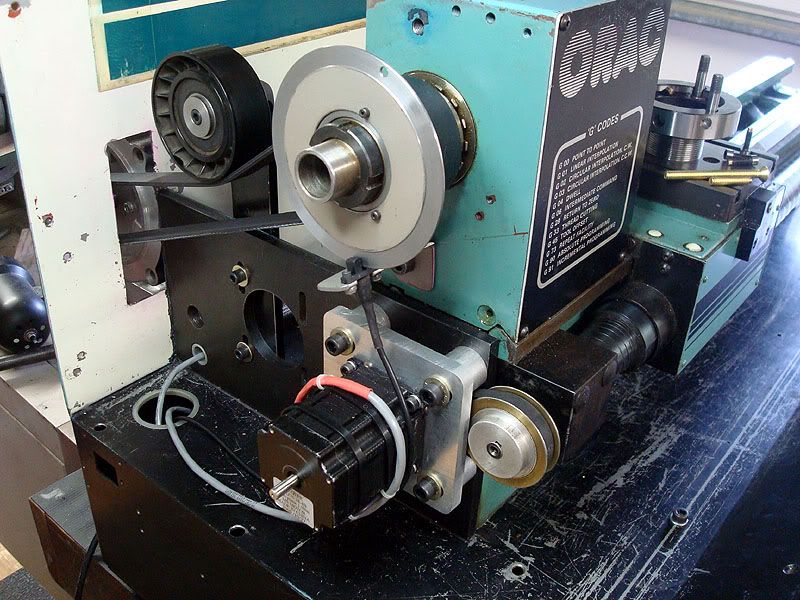
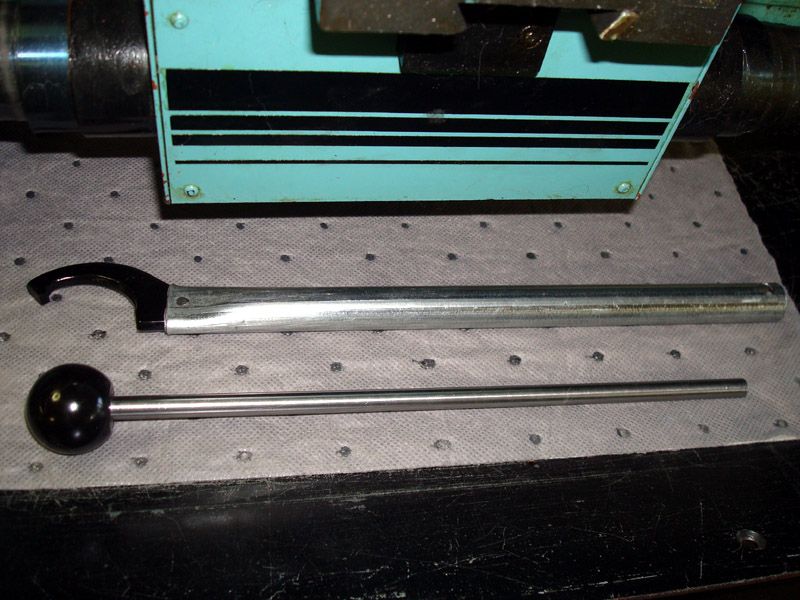
Made up a replacement end plate to fit the missing one on the original ORAC belt cover.  Also made a tommy bar and extended spanner wrench to tighten the cr@p out of the ER32 collet nut.  Spanner extension is just a length of electrical conduit smashed flat on one end & hammered down onto the wrench with a rivet made from a soft nail to secure it.


402
General Mach Discussion / Re: Denford Microrouter V3 conversion to Mach3
« on: August 22, 2012, 02:10:27 PM »
I did what you're wanting to do on my Denford Micromill although my machine and its controller were older than yours.  I think all the Baldor type controllers with the removable serial input top card are very similar and can be connected up the same.

Remove the top card with the LED & serial cable and under that should be a 3 row 96 pin header.  Hook up the step/dir/gnd wires from your B.O.B. to the pins shown below and it should work.  I used Futaba/Hitec R/C servo connectors to plug onto the pins but I think anything lying around with .100" spacing will work.

It works great for me but DO THIS AT YOUR OWN RISK AND DON'T BLAME ME IF IT DOESN'T WORK!  I'd suggest you go to the Denford site and look around before going ahead with it.  Great bunch'a fellers there.  http://www.denfordata.com/bb/

403
Show"N"Tell ( Your Machines) / Re: Denford ORAC lathe retrofit.
« on: August 22, 2012, 09:32:14 AM »
Looks good! Offsets and programming should be easier than what you've done so far :)

Dan
Thanks Dan, I hope you're right.  I get by OK with stuff I can hold in my hand and beat the heck out of until it fits but software gives me the willies.  Hammers don't mean a thing to software.:)

404
Show"N"Tell ( Your Machines) / Re: Denford ORAC lathe retrofit.
« on: August 21, 2012, 06:15:13 PM »
Looks good. The electronics on runners is a nice touch.


Must have some Scottish blood in me, eh Hood?
...
I added 4 brass tipped screws
You've got a lot to learn. You could acheive the same thing with 3 screws and saved some brass and a screw ;)

Now THAT'S funny!:)

405
Show"N"Tell ( Your Machines) / Denford ORAC lathe retrofit.
« on: August 21, 2012, 01:16:10 PM »
Been working on a Denford ORAC retrofit for much longer than I’m willing to admit but it’s getting close enough that I figured I’d stick m’toe in the water and join the fun.

I bought it from a fellow in Detroit and had it shipped by truck to me here in west Tennessee, USA.  I work for the local Jaguar-Land Rover dealer so am experienced with British engineering.:D

It was purchased with nothing other than the bare lathe and the stripped clean base unit.  I also have a Denford Micromill converted to Mach control and had bought a spare SmartStep/3 controller for it so that’s the controller I chose to use for the ORAC.  Meager budget & all y’know.

The ORAC base unit had no structure underneath the lathe other than the sheet metal top and I felt it would flex so I added some crosswise angle iron braces with vertical brackets to tie the top more rigidly to the bottom which has lengthwise stiff channels.  It all seems very rigid now.

I added a couple Home Depot drawer slides and a piece of aluminum plate to use as a pull-out equipment tray as I knew I’d be putzing around with electronics a lot and needed good access to it all.  The big aluminum plate serves as a dandy heat sink as well.  The original front panel was missing so I cobbled up one from a piece of heavy gauge metal shelving hinged with a piece of B727 access panel hinge that was given to me.

The missing original motor was ½ hp AC  w/VFD but I got a brand new ¾ hp Baldor DC motor off eBay cheap..  It was way too big to go in the original location and had to be mounted on the “back porch” and a hole cut in the back panel for the belt.  The KBIC-120 SCR speed control & motor made such a loud buzzing noise I had to mount the motor on rubber isolators I got from a parted-out treadmill.  It’s whisper quiet now.

I made some aluminum adaptors to fit a pair of NEMA 23 steppers that a kind forum member here gave me and made the X-axis cable sheath from the braided stainless steel covering off an old washing machine hose I’ve saved for years.  Must have some Scottish blood in me, eh Hood?

The last pic is the adjustable ER32 collet chuck I rigged up.  I added 4 brass tipped screws to allow precise adjustments of the chuck before the flange nuts are fully tightened.  The chuck flange I.D. is a little bigger than the EMCO spindle snout to allow enough movement to exactly dial in collets if their runout is excessive or when working with existing parts that have features that aren’t concentric.  I’m real happy with the way it works.

Next up is a twin QCTP plate to be added to the carriage and then learning tool offsets & the like.  Not looking forward to that.


406
Show"N"Tell ( Your Machines) / Re: Conect 121 lathe retro
« on: August 20, 2012, 08:45:11 PM »
Thanks for the great info mc; that's really given me some hope & ideas for the future of my ORAC!

What was the limitation drilling steel, spindle power or Z-axis power?

ps: Sorry for the thread drift Hood.

407
Show"N"Tell ( Your Machines) / Re: Conect 121 lathe retro
« on: August 20, 2012, 01:21:17 PM »
Wow, mc your ER gang tooling attachment is great!  I couldn't tell from the pic, does it bolt down to the carriage or clamp in a QCTP?

I'm in the planning stages for a twin QCTP attachment for my little ORAC.  Could you take a few notes and post a "Tools & Offsets For Dummies" how-to thread when you start setting up Mach for yours?  Pretty-Please? ;D

408
That's way too easy! ;D

(Thanks, great idea....I'll try it.)

409
Thanks Hood, I appreciate it.  Fortunately this little machine will be used for small jobs that won't have tight timelines so I should have time to proceed with caution and cut enough air to save huge crashes...hopefully.

Another question though...I totally forgot about the considerable amount of weight that an extension plate and extra QCTP/toolholder will add.  My planned extension plate will weigh about 7 lbs plus the weight of an extra AXA100 QCTP and a toolholder (5 or 6 lbs probably)  I had to use the stepper motors & driver I had on hand which are only about 220 in/oz torque.  When hooked up & running via the original Denford timing belt drives and ballscrews they "feel" amazingly strong (compared to my wimpy little Denford MicroMill) but now I'm worried about the added weight.  Not being a production machine the feedrates and acceleration can be slowed down to help but am I crazy to try this?  

Come to think about it, the optional Denford turret probably wasn't what one could call light though.

410
General Mach Discussion / Basic questions about dual lathe toolholders
« on: August 09, 2012, 02:56:50 PM »
I’m getting closer & closer to actually cutting metal with my Denford ORAC lathe retrofit project and am seeking some basic tooling knowledge from ye grizzled CNC lathe vets. ;D

The ORAC is pretty small (8” swing) and has a small t-slot table on the carriage.  It didn’t come with the turret option unfortunately.  My plan is to bolt on an extension plate (5/8” x 4” x 10” ish steel) via the slots, install 1 AXA100 wedge QCTP in the normal location and either a 2nd identical QCTP on t’other end of the plate or make a parting blade holder to go on the end of the plate.

1)  Do dual QCTP’s make sense in the real world or is that a waste of money on such a small lathe?  I have one for the lathe now and would have to purchase a 2nd one if I go that route.

2)  Do the tool table & offset features in Mach work pretty well in preventing crashes with dual tool holders?  I can’t afford “real” lathe CAM at this time so I’ll be using the Wizards and doing some hand coding.  I’m still reading and trying to get my head around tool tables, tip radius and the like.

3)  Do any basic dual tool holder tips or hard earned lessons come to mind?  I have a lot to learn and any thoughts on the matter would be greatly appreciated.

Thanks!

Pages: « 1 2 3 4 5 6 7 8 9 10 11 12 13 14 15 16 17 18 19 20 21 22 23 24 25 26 27 28 29 30 31 32 33 34 35 36 37 38 39 40 41 42 43 44 »