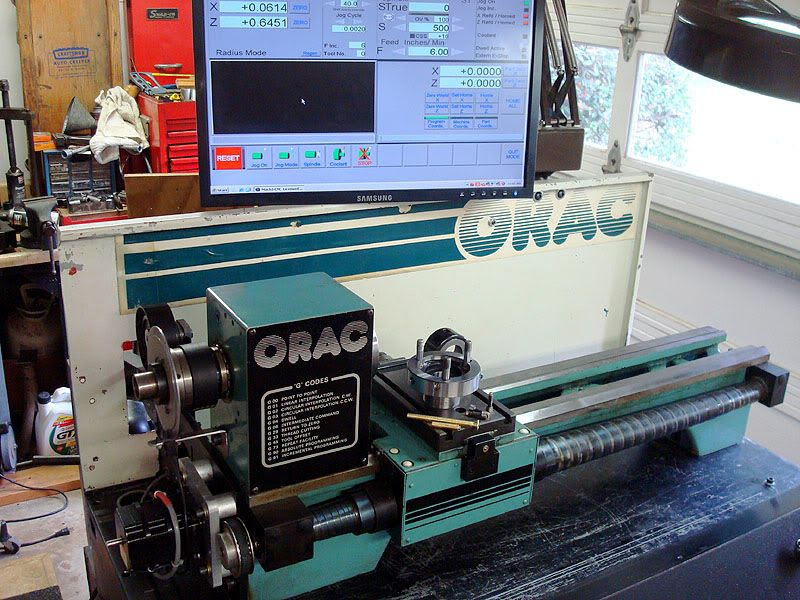
Been working on a Denford ORAC retrofit for much longer than I’m willing to admit but it’s getting close enough that I figured I’d stick m’toe in the water and join the fun.
I bought it from a fellow in Detroit and had it shipped by truck to me here in west Tennessee, USA. I work for the local Jaguar-Land Rover dealer so am experienced with British engineering.

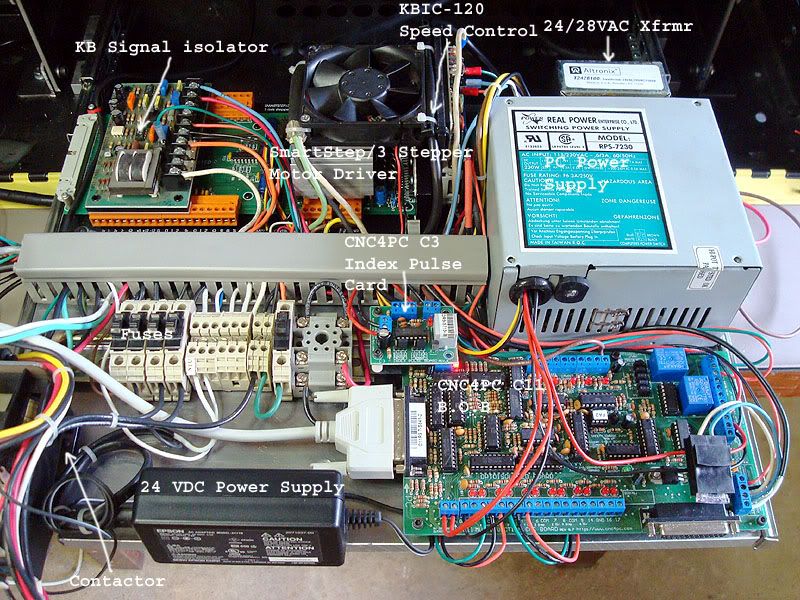
It was purchased with nothing other than the bare lathe and the stripped clean base unit. I also have a Denford Micromill converted to Mach control and had bought a spare SmartStep/3 controller for it so that’s the controller I chose to use for the ORAC. Meager budget & all y’know.
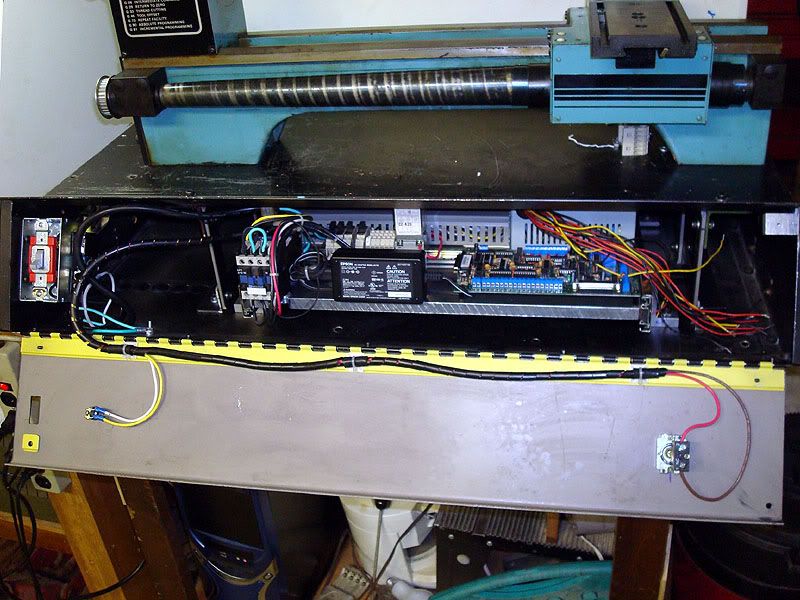
The ORAC base unit had no structure underneath the lathe other than the sheet metal top and I felt it would flex so I added some crosswise angle iron braces with vertical brackets to tie the top more rigidly to the bottom which has lengthwise stiff channels. It all seems very rigid now.
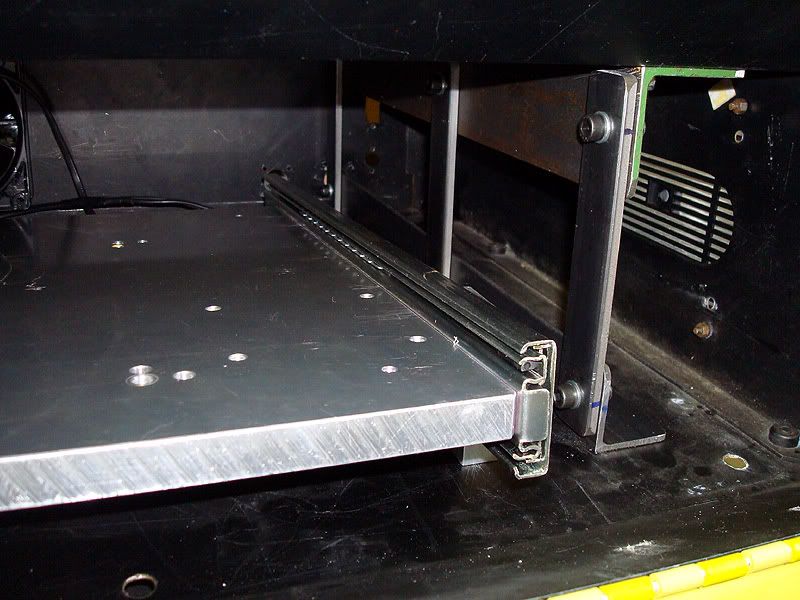
I added a couple Home Depot drawer slides and a piece of aluminum plate to use as a pull-out equipment tray as I knew I’d be putzing around with electronics a lot and needed good access to it all. The big aluminum plate serves as a dandy heat sink as well. The original front panel was missing so I cobbled up one from a piece of heavy gauge metal shelving hinged with a piece of B727 access panel hinge that was given to me.
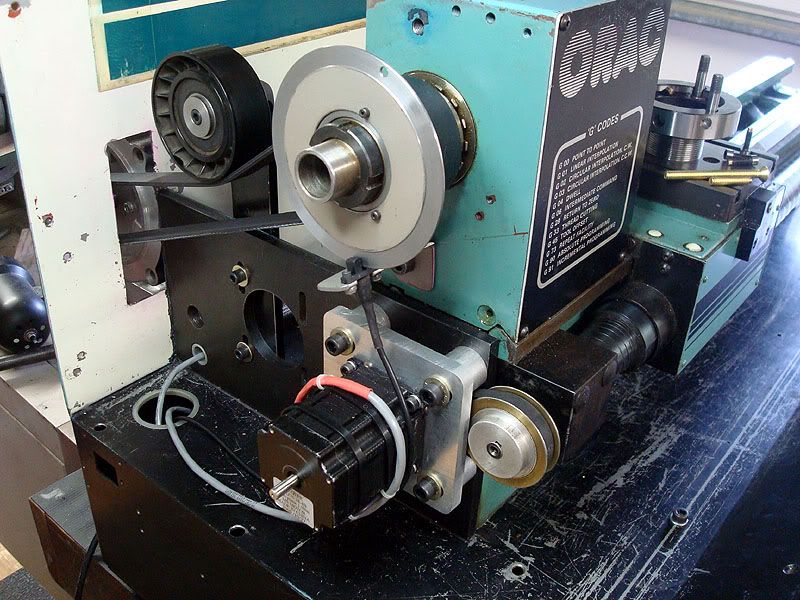
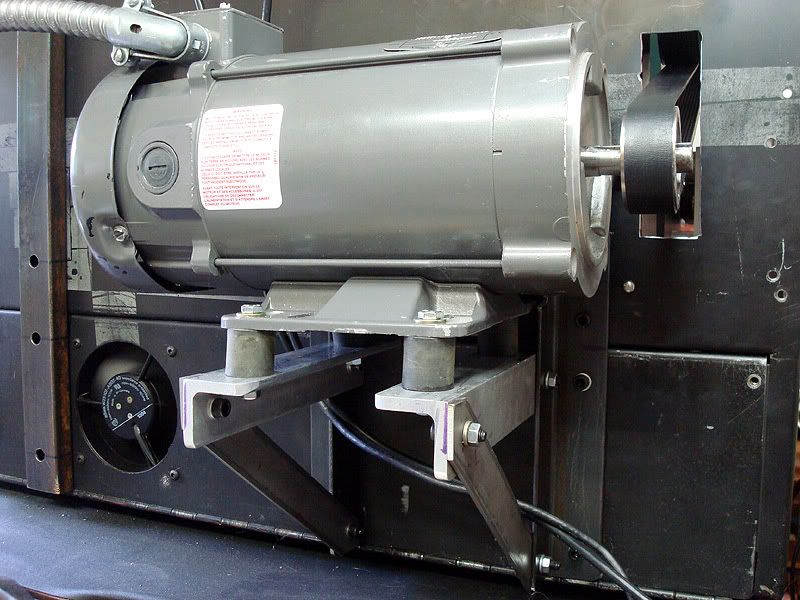
The missing original motor was ½ hp AC w/VFD but I got a brand new ¾ hp Baldor DC motor off eBay cheap.. It was way too big to go in the original location and had to be mounted on the “back porch” and a hole cut in the back panel for the belt. The KBIC-120 SCR speed control & motor made such a loud buzzing noise I had to mount the motor on rubber isolators I got from a parted-out treadmill. It’s whisper quiet now.
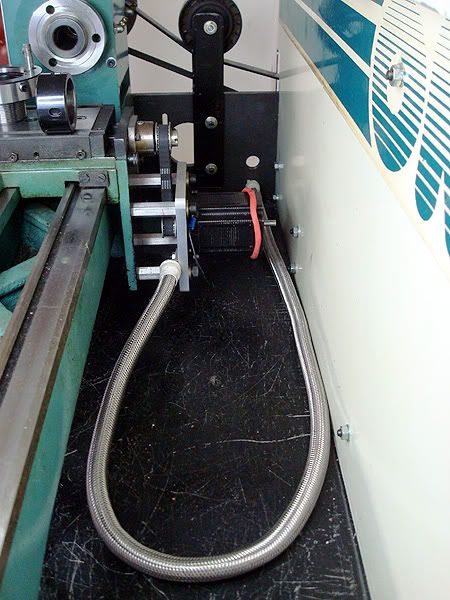
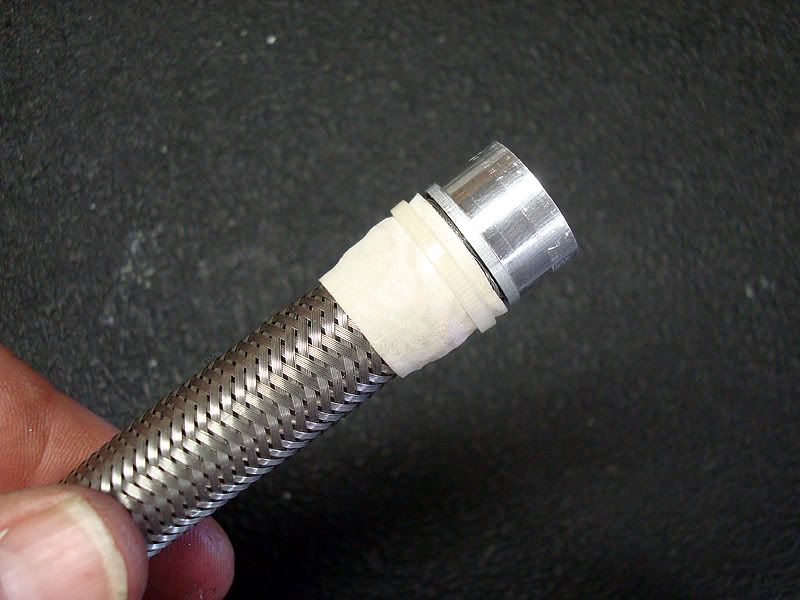
I made some aluminum adaptors to fit a pair of NEMA 23 steppers that a kind forum member here gave me and made the X-axis cable sheath from the braided stainless steel covering off an old washing machine hose I’ve saved for years. Must have some Scottish blood in me, eh Hood?
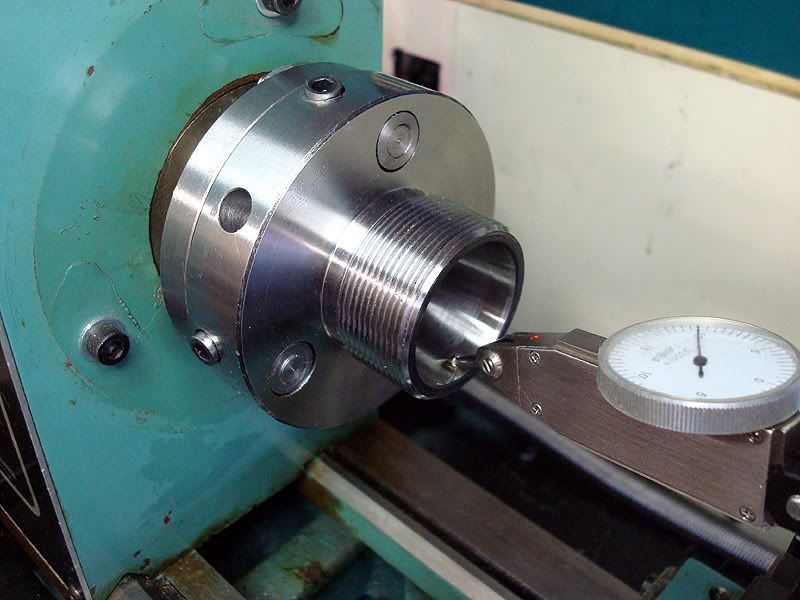
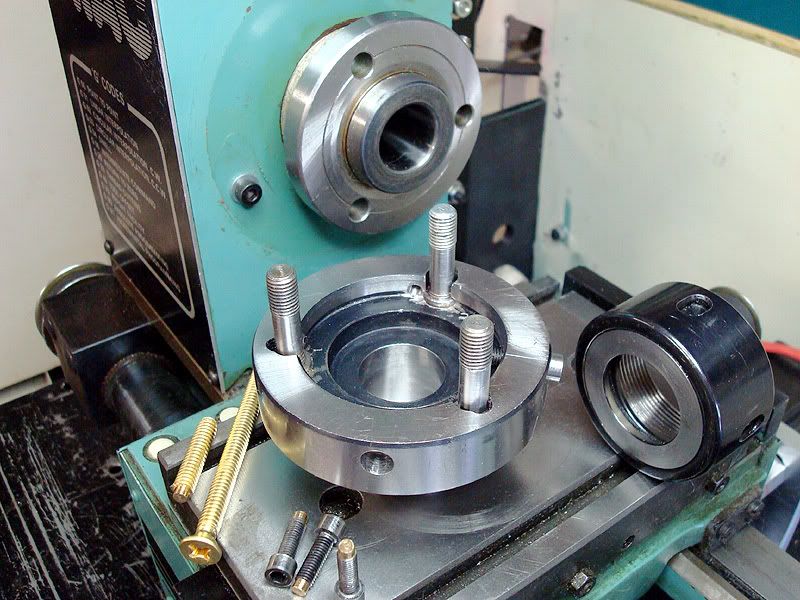
The last pic is the adjustable ER32 collet chuck I rigged up. I added 4 brass tipped screws to allow precise adjustments of the chuck before the flange nuts are fully tightened. The chuck flange I.D. is a little bigger than the EMCO spindle snout to allow enough movement to exactly dial in collets if their runout is excessive or when working with existing parts that have features that aren’t concentric. I’m real happy with the way it works.
Next up is a twin QCTP plate to be added to the carriage and then learning tool offsets & the like. Not looking forward to that.