Rather than clutter up Hoods Conect thread, here's the final item. It's taken far longer than planned to finish, as other stuff keeps getting in the way, but I've been making a point to grab the odd hour over the past few weeks to get this finished.
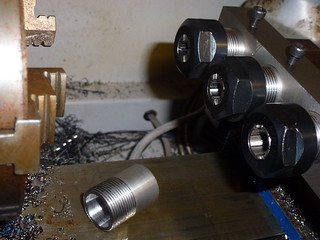 Gang Collet Holder
 by
mc_mtb, on Flickr
As mentioned in my last post, the lathe simply doesn't have the power to drill steel. So after marking the holes, the holder was put into the milling machine, and the holes drilled to a mm or so under the final size, ready for boring to final size. The holder was then put back on the lathe (after using it to make a
20mm adapter for my boring head, so I could mount in in the ER32 chuck), and using a bit manually coded G-code, bored the holes out to final size -
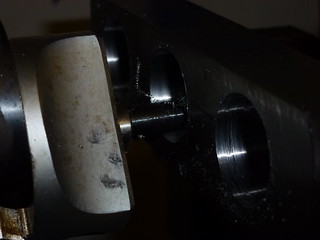 190_LatheBoring
 by
mc_mtb, on Flickr
This process was a bit tedious, however by the time the holes were bored to size, I had the G-code tweaked so the spindle stopped before rapiding back to the start, and I could just about have the boring head adjusted ready to hit cycle start again.
And in case you're wondering how the holder is supported, I machined a basic support that is permanently bolted to the cross slide.
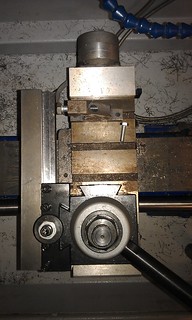 Gang tool holder
 by
mc_mtb, on Flickr
The holders were made from some 1" silver steel I had lying around. I cut sections long enough to get 2 holders out of each, faced and drilled it to 12.5mm on my other lathe (big enough for the boring bar to fit in), then mounted them in the Conect, set it to work, changed the tools when needed, then spinning the stock in the lathe, before repeating, then finally parting the two holders in the other lathe.
I'm still needing to order stub drills to try the holder properly, however using an 8mm jobber drill which
just cleared the collet chuck (Z-axis travel is limited due to the ballscrew covers), it sank into some alumiunium without any issue. I'll admit I was abit worried about this after the lathes inability to drill steel, however it sank straight in without any hessitation.
